Part 5: Using Custom Domains and Subdomains
Goals
Learn how to publish your site at a custom domain and optionally use a sub-domain.
Steps to Complete
-
Depending on whether you already own a domain, or need a new domain, steps to attach a custom domain to a Netlify deployment will vary.
Netlify has good documentation on this topic.
TipIf you are registering a new domain, it is easiest to use Netlify to purchase the domain and configure it for use.
If you already have a domain registered through another company, you can delegate the apex domain, or sub-domains, to Netlify.
Allowing Netlify to handle DNS for your deployments also makes it much easier to configure subdomains – for example, assigning each course website that you will create to a different subdomain.
The following instructions will assume you are using Netlify to configure a domain for your deployment.
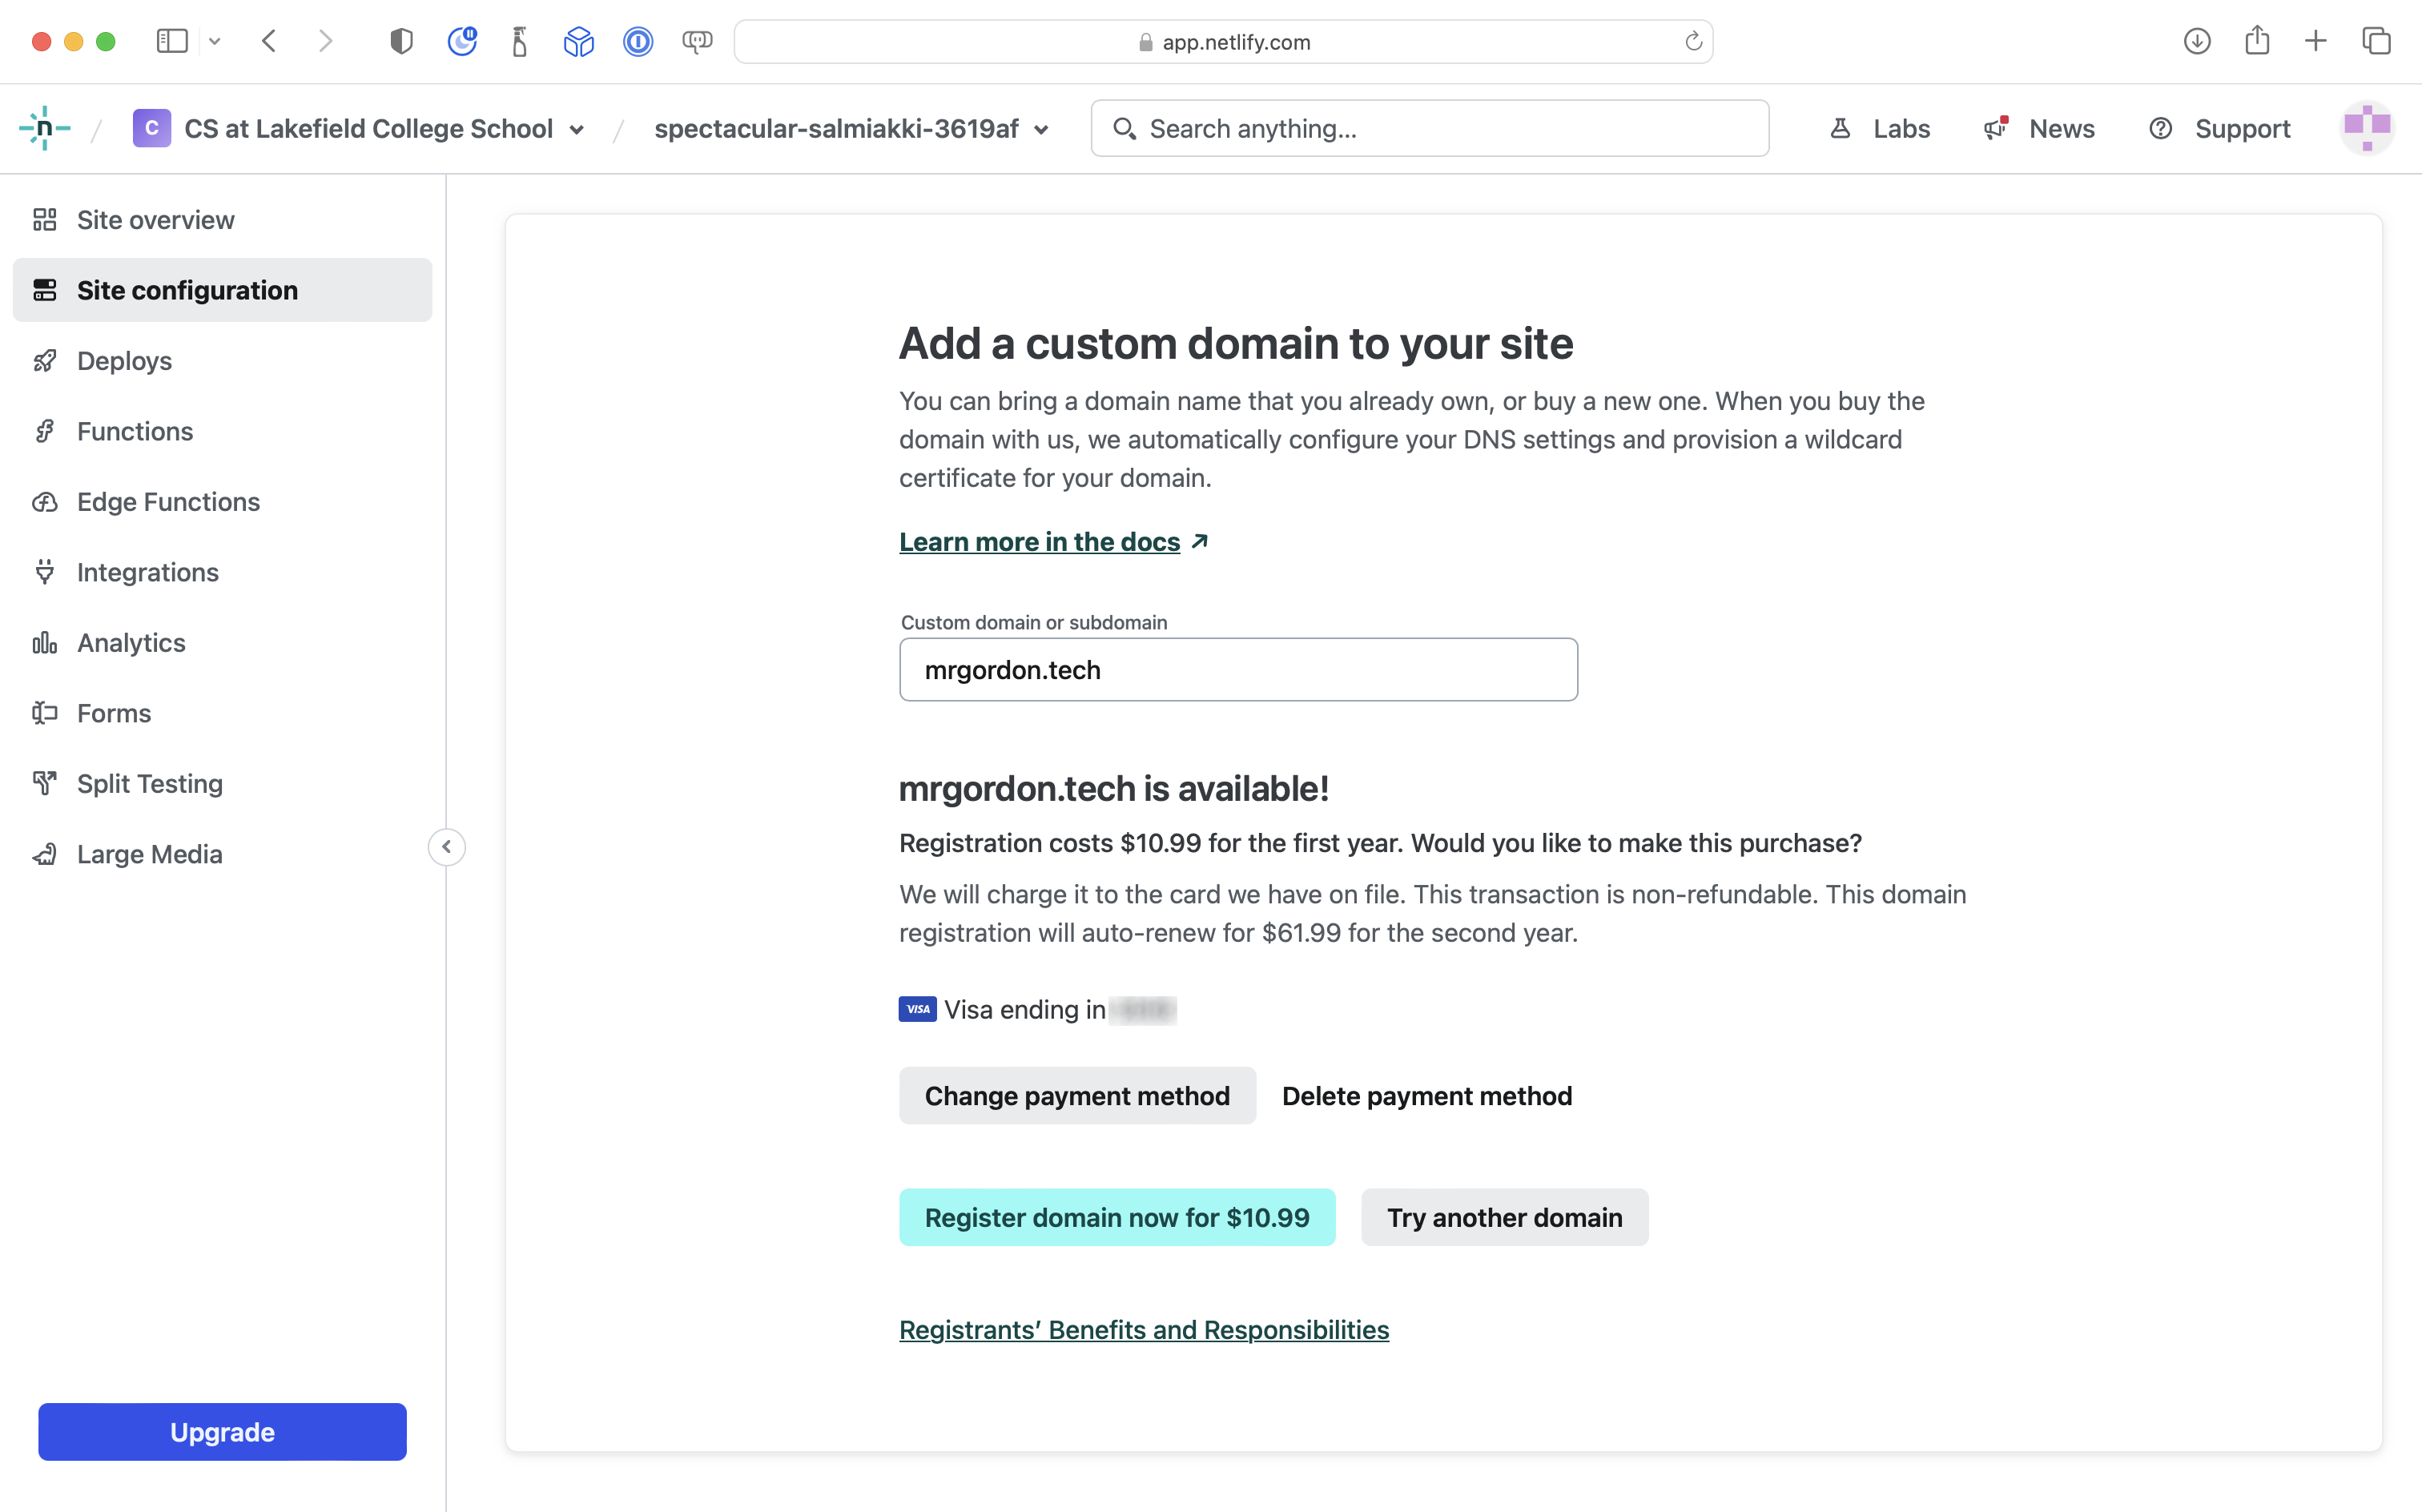
Here is what the final step before a purchase looks like, after selecting a domain and then providing payment information:
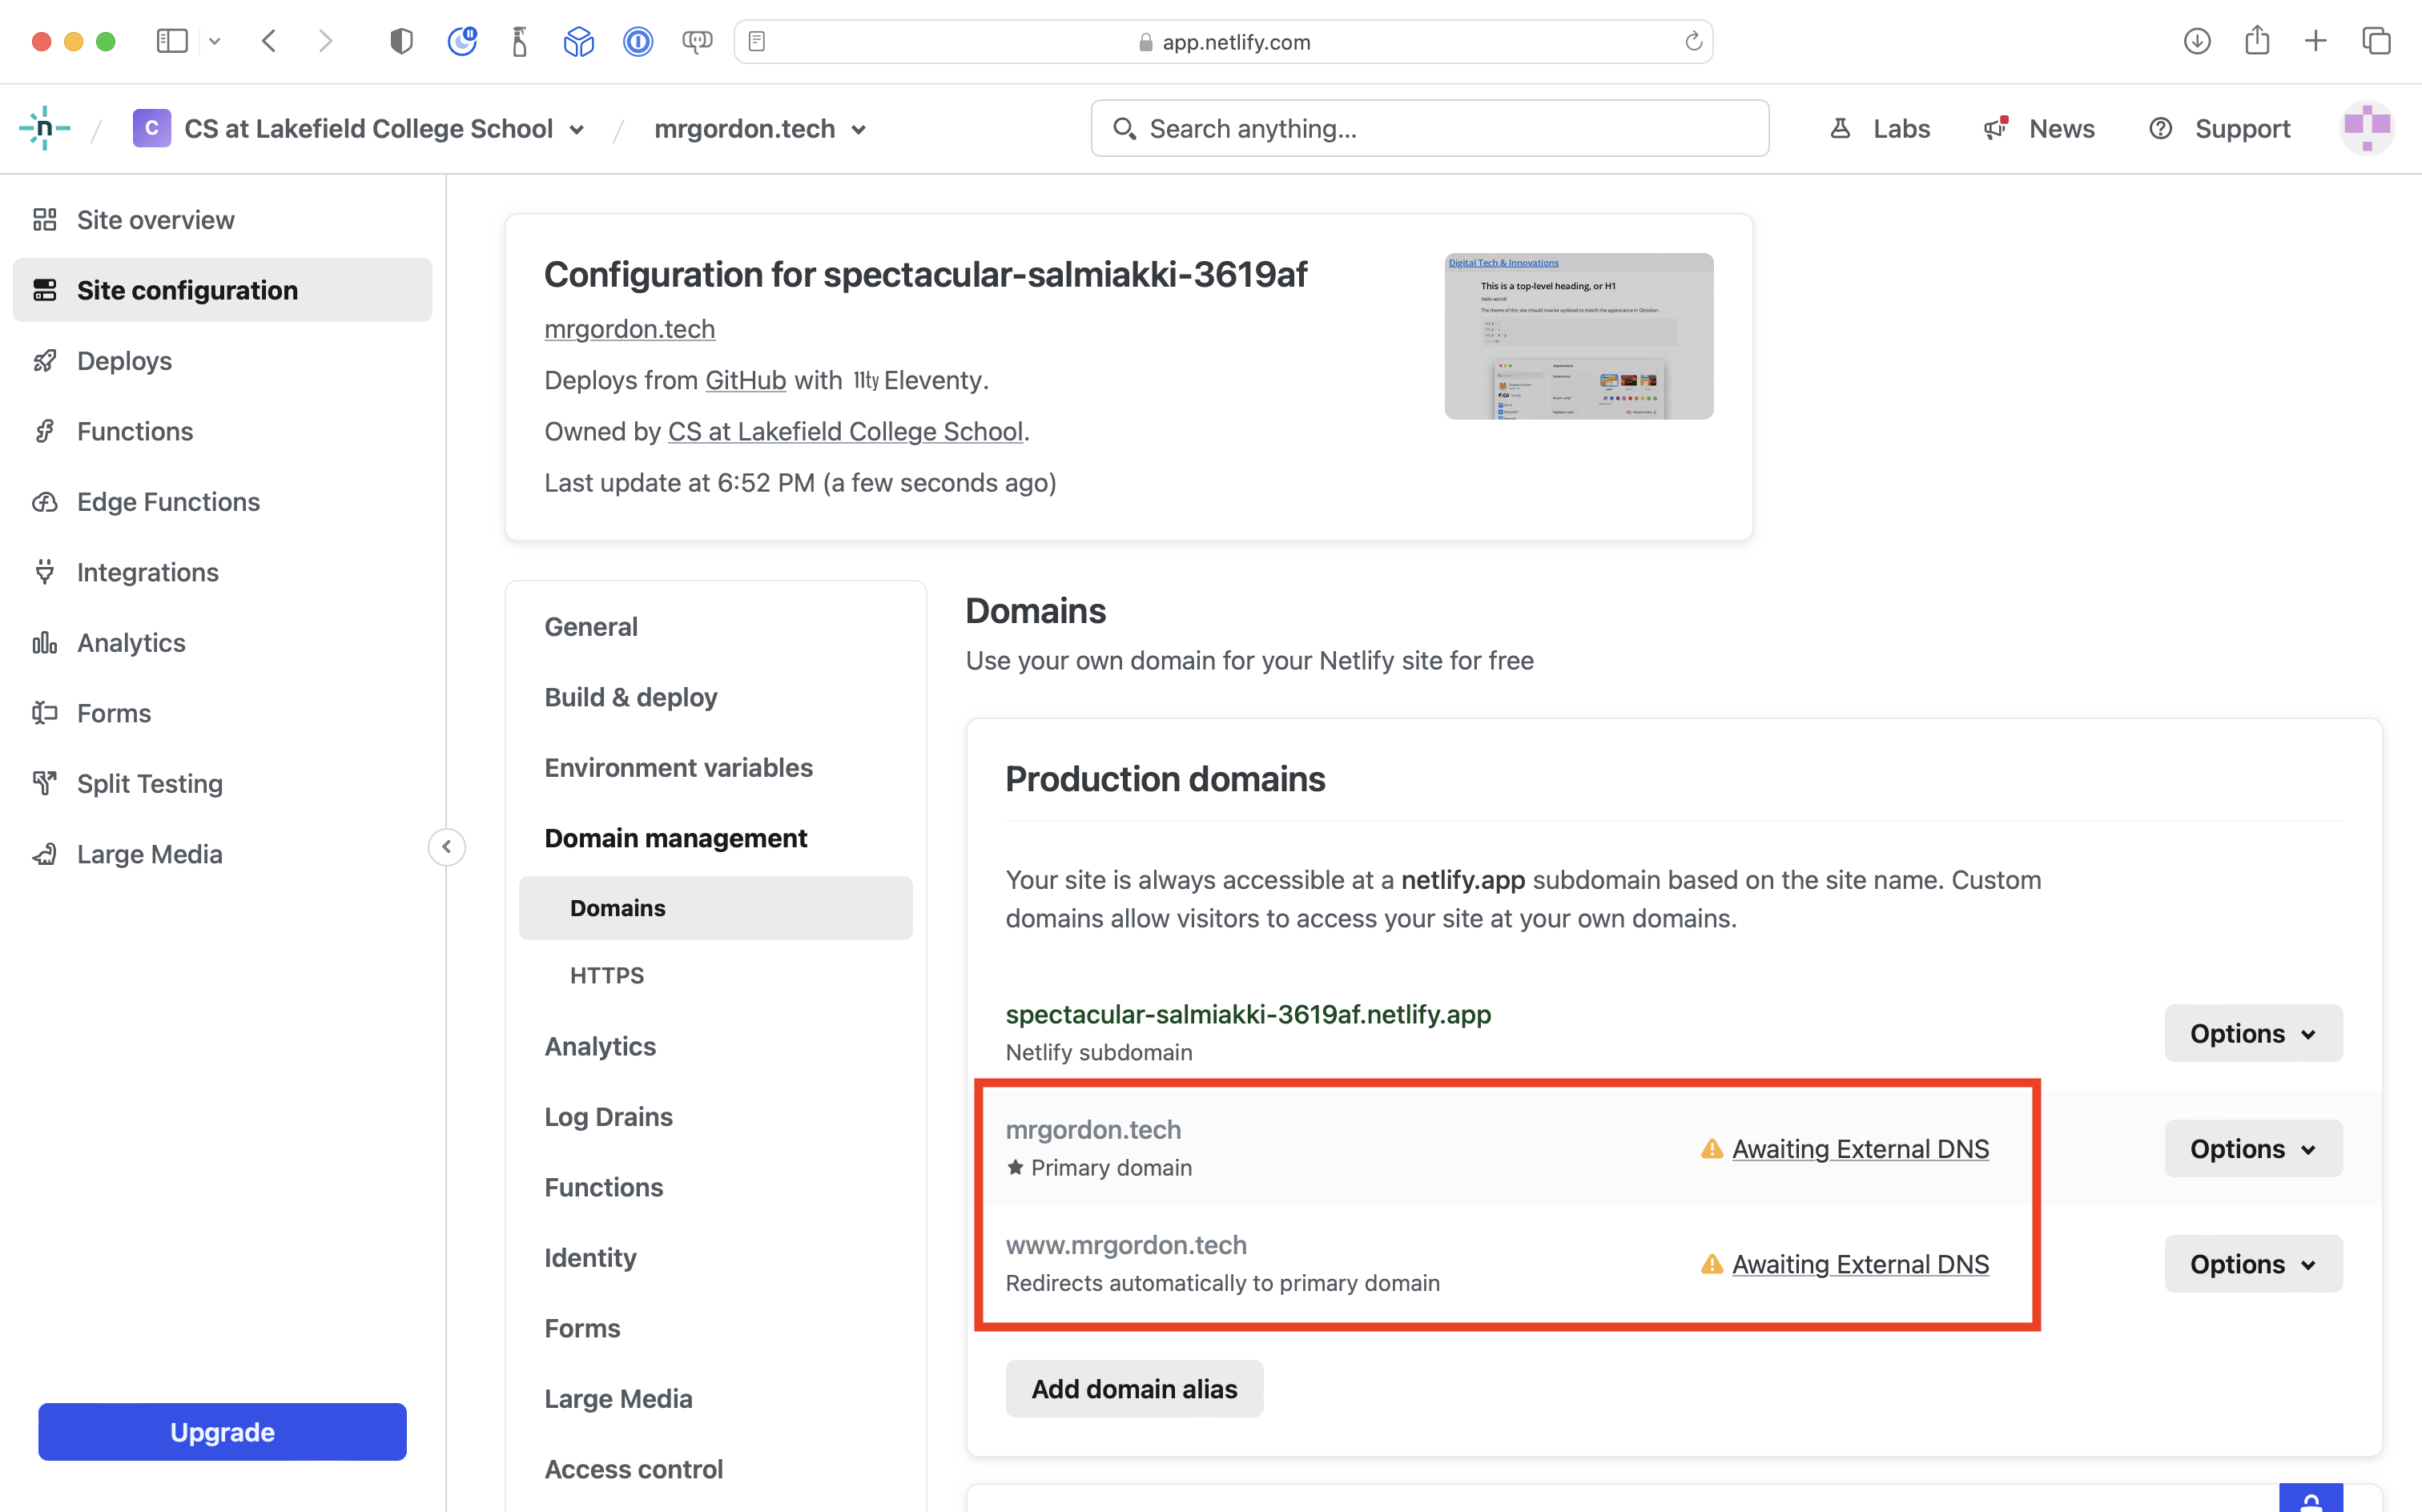
After purchasing a domain, it will take up to 24 hours, but often less than that, for the new domain name to propagate through the DNS system. Initially, you will see this status message regarding your new domain:
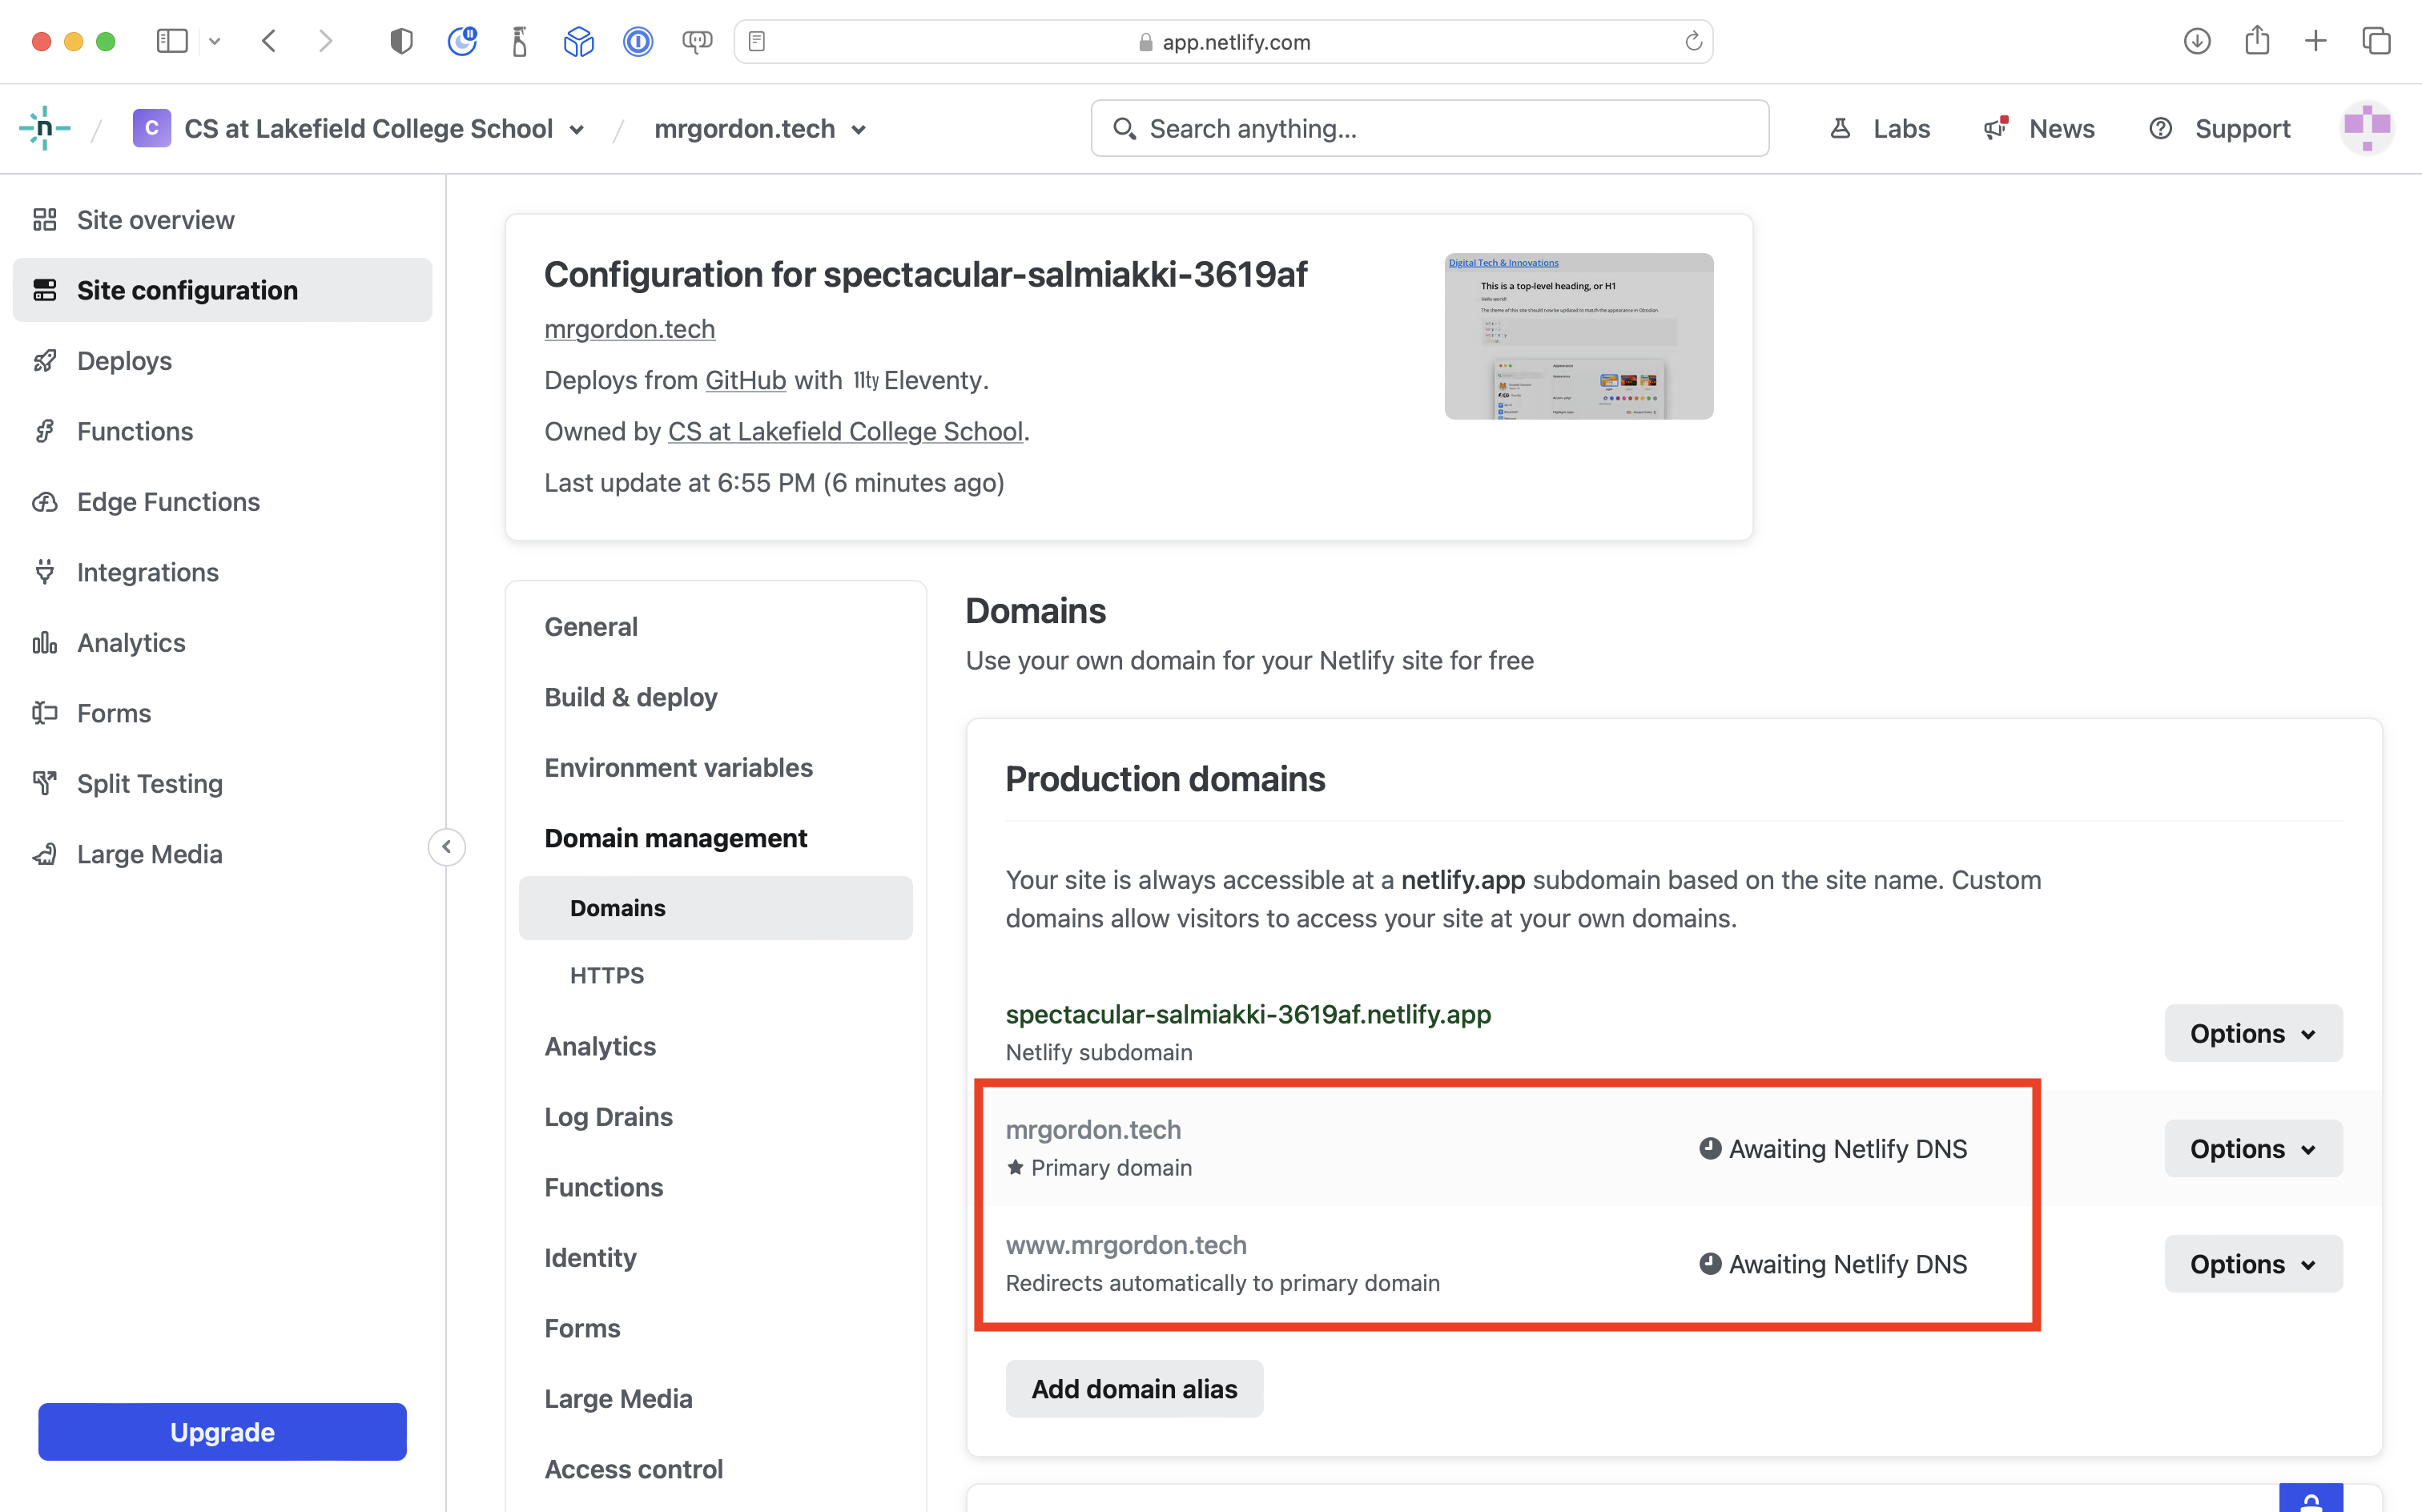
After perhaps 15 minutes, you will see the status updated as follows:
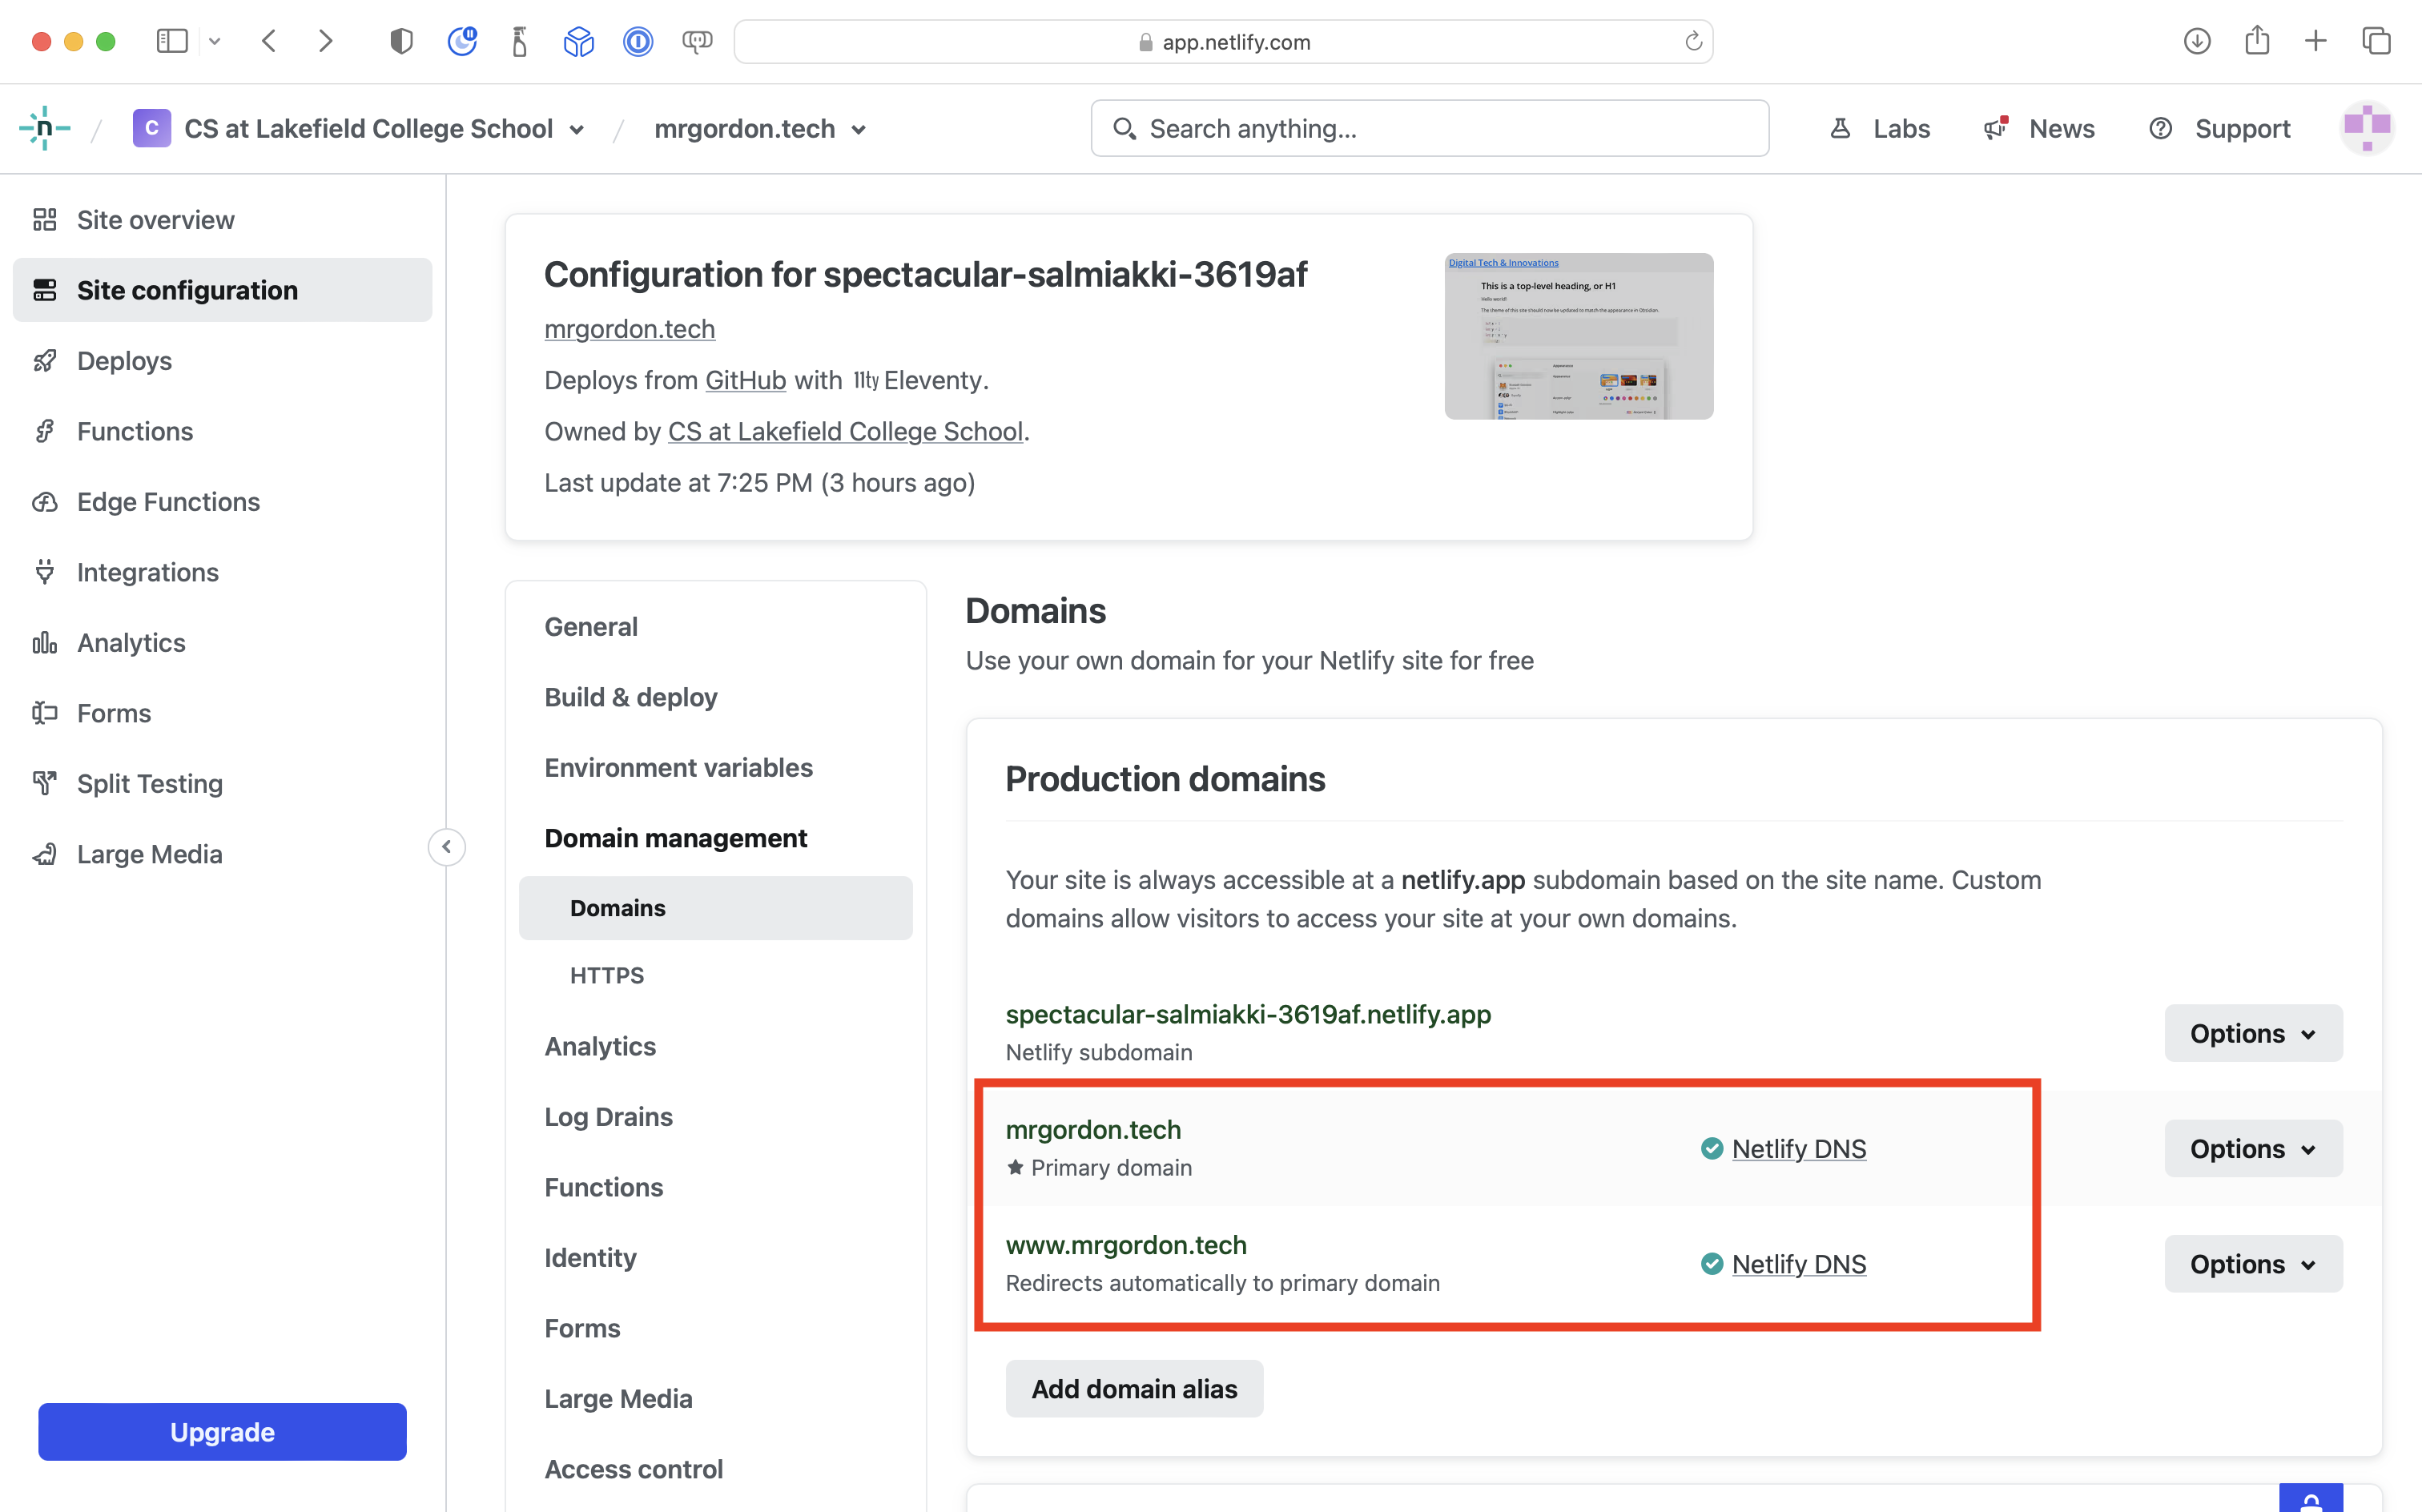
Finally, you should see this message:
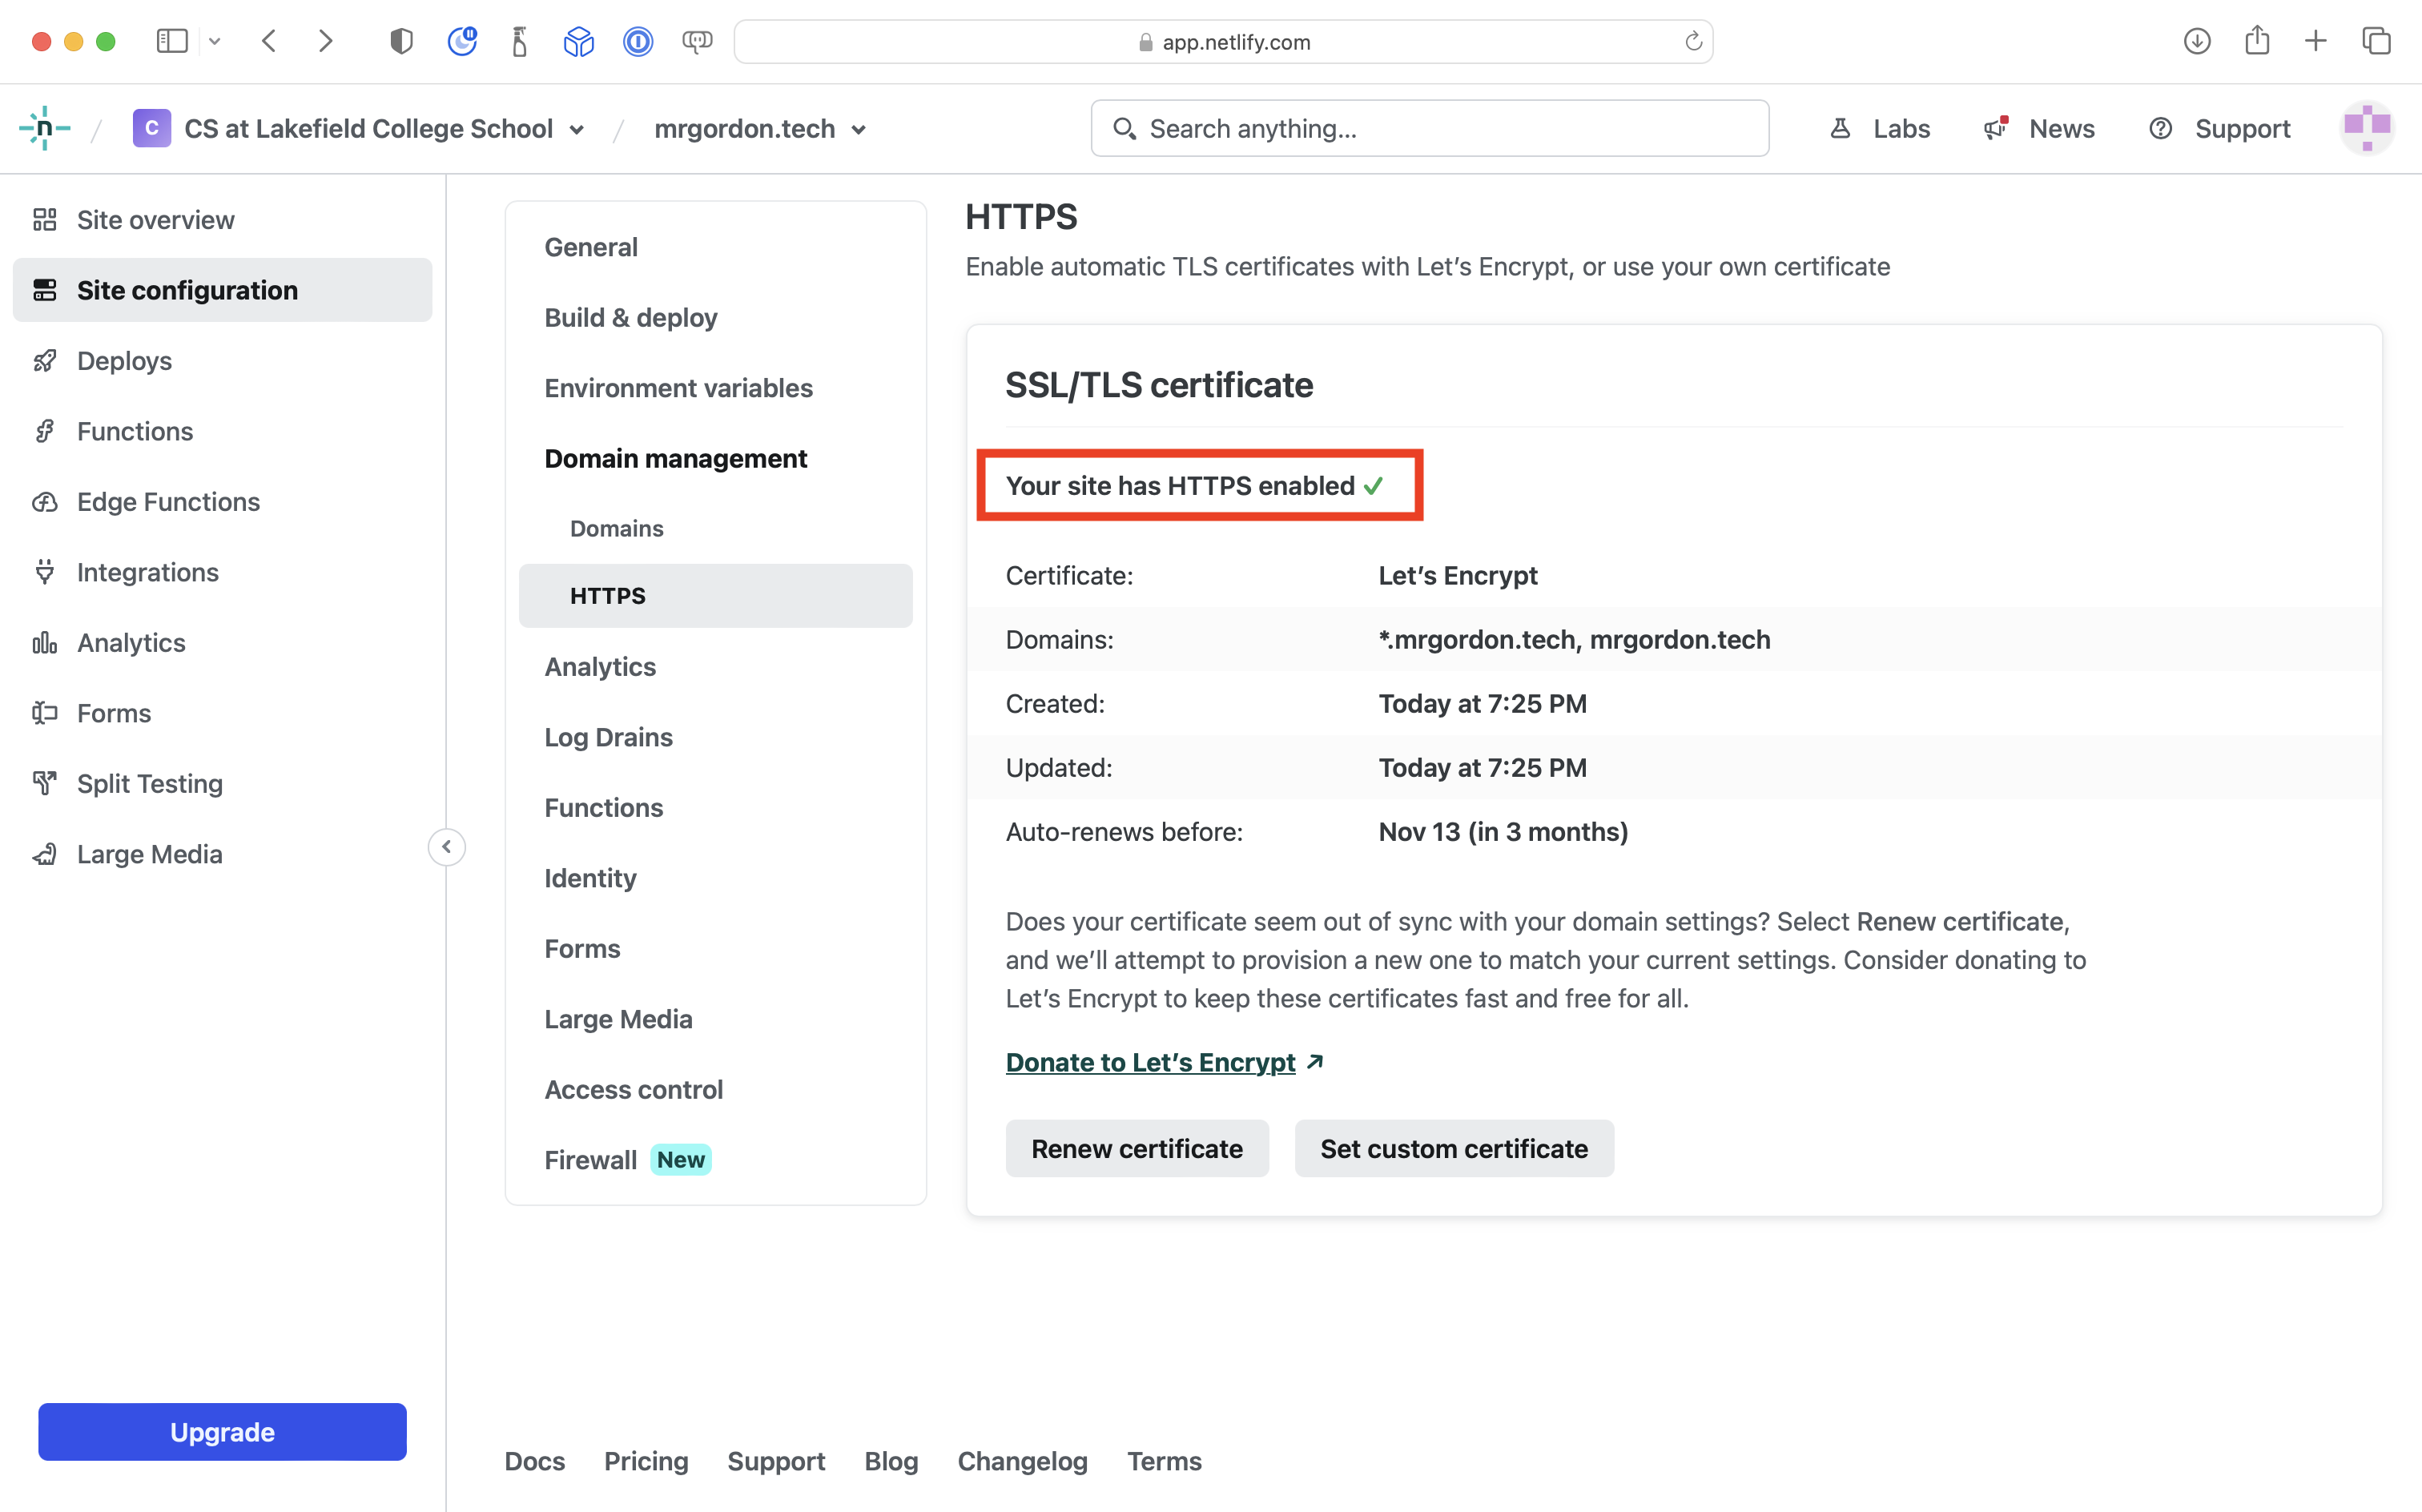
Scrolling down, you will also see that an SSL/TLS certificate has been generated automatically for you, ensuring that your site will be accessible over HTTPS:
-
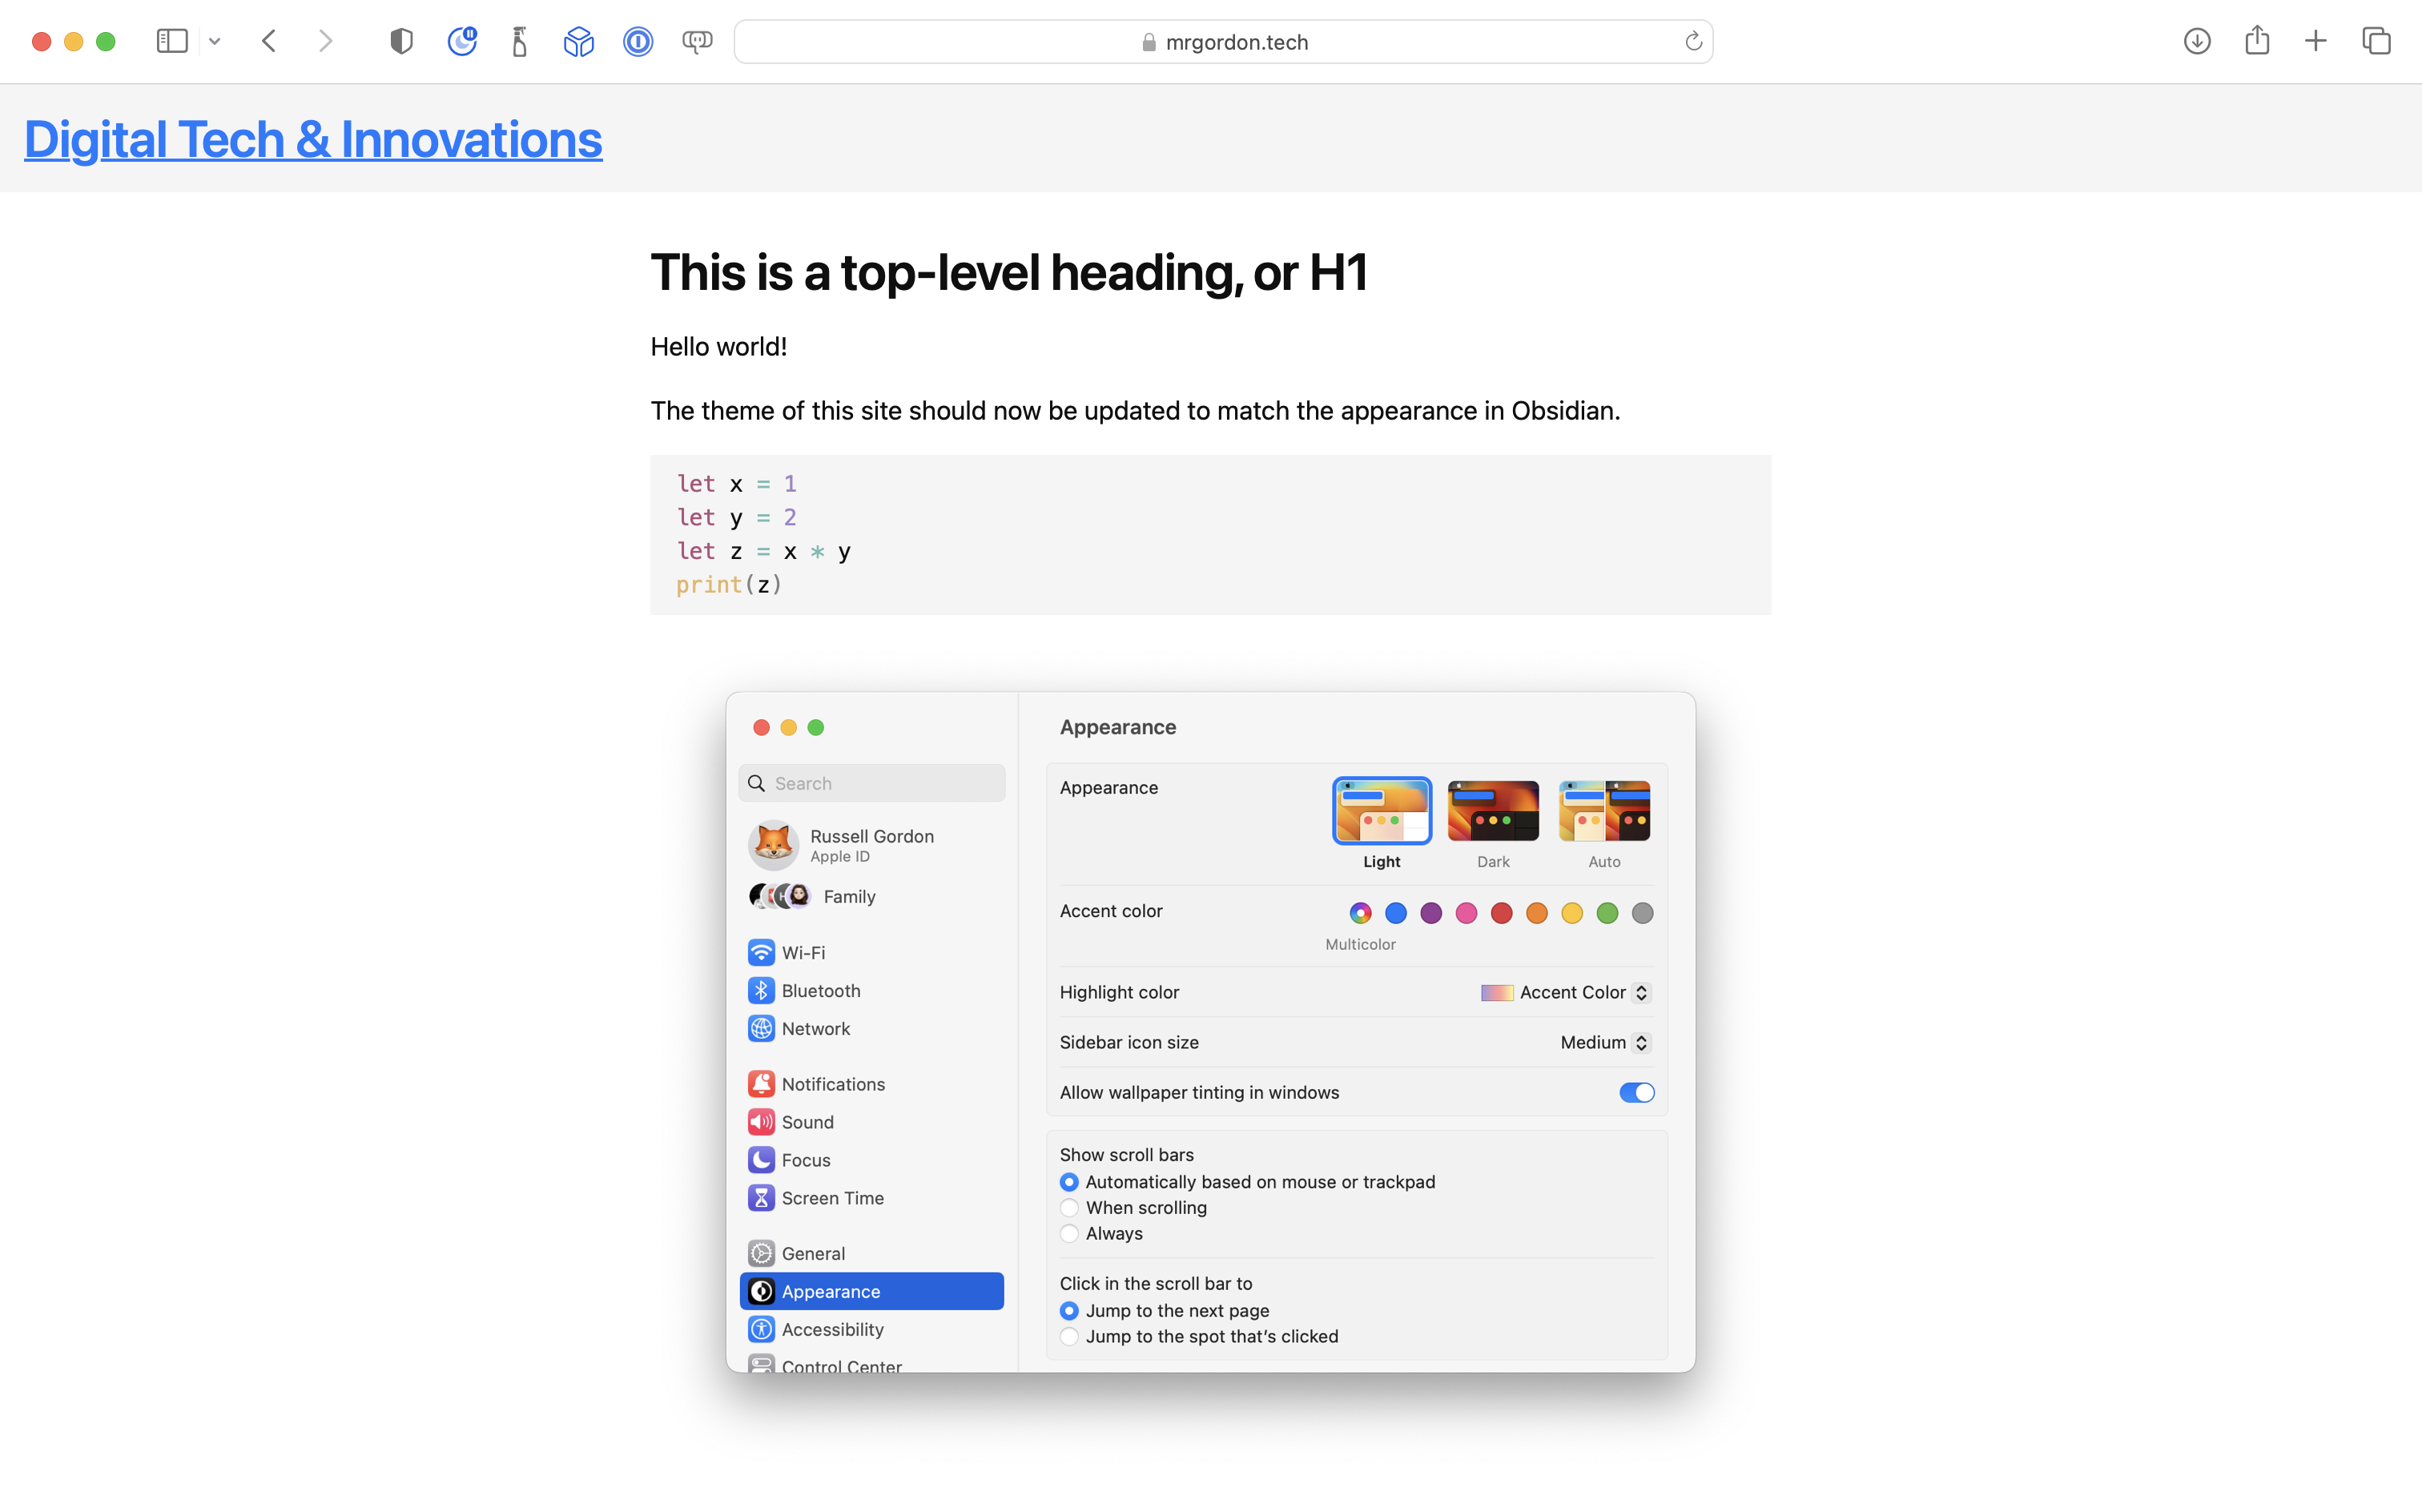
Your domain name is now fully propagated. In this example, the site is now accessible at mrgordon.tech:
-
Using sub-domains is a great way to organize courses.
The apex domain, such as mrgordon.tech, might instead be a simple placeholder:
A given sub-domain then holds an Obsidian vault / GitHub repository / Netlify deployment for a given course.
For example:
mrgordon.tech(placeholder)icd2o-2023.mrgordon.tech(Grade 10 CS)ics3u-2023.mrgordon.tech(Grade 11 CS)ics4u-2023.mrgordon.tech(Grade 12 CS)
To use this approach, begin at the publishing setup stage for each new course.
Once you have a deployment set up at Netlify for the new course, assuming that:
- you used Netlify to purchase your domain
- you have already registered and set up an apex domain
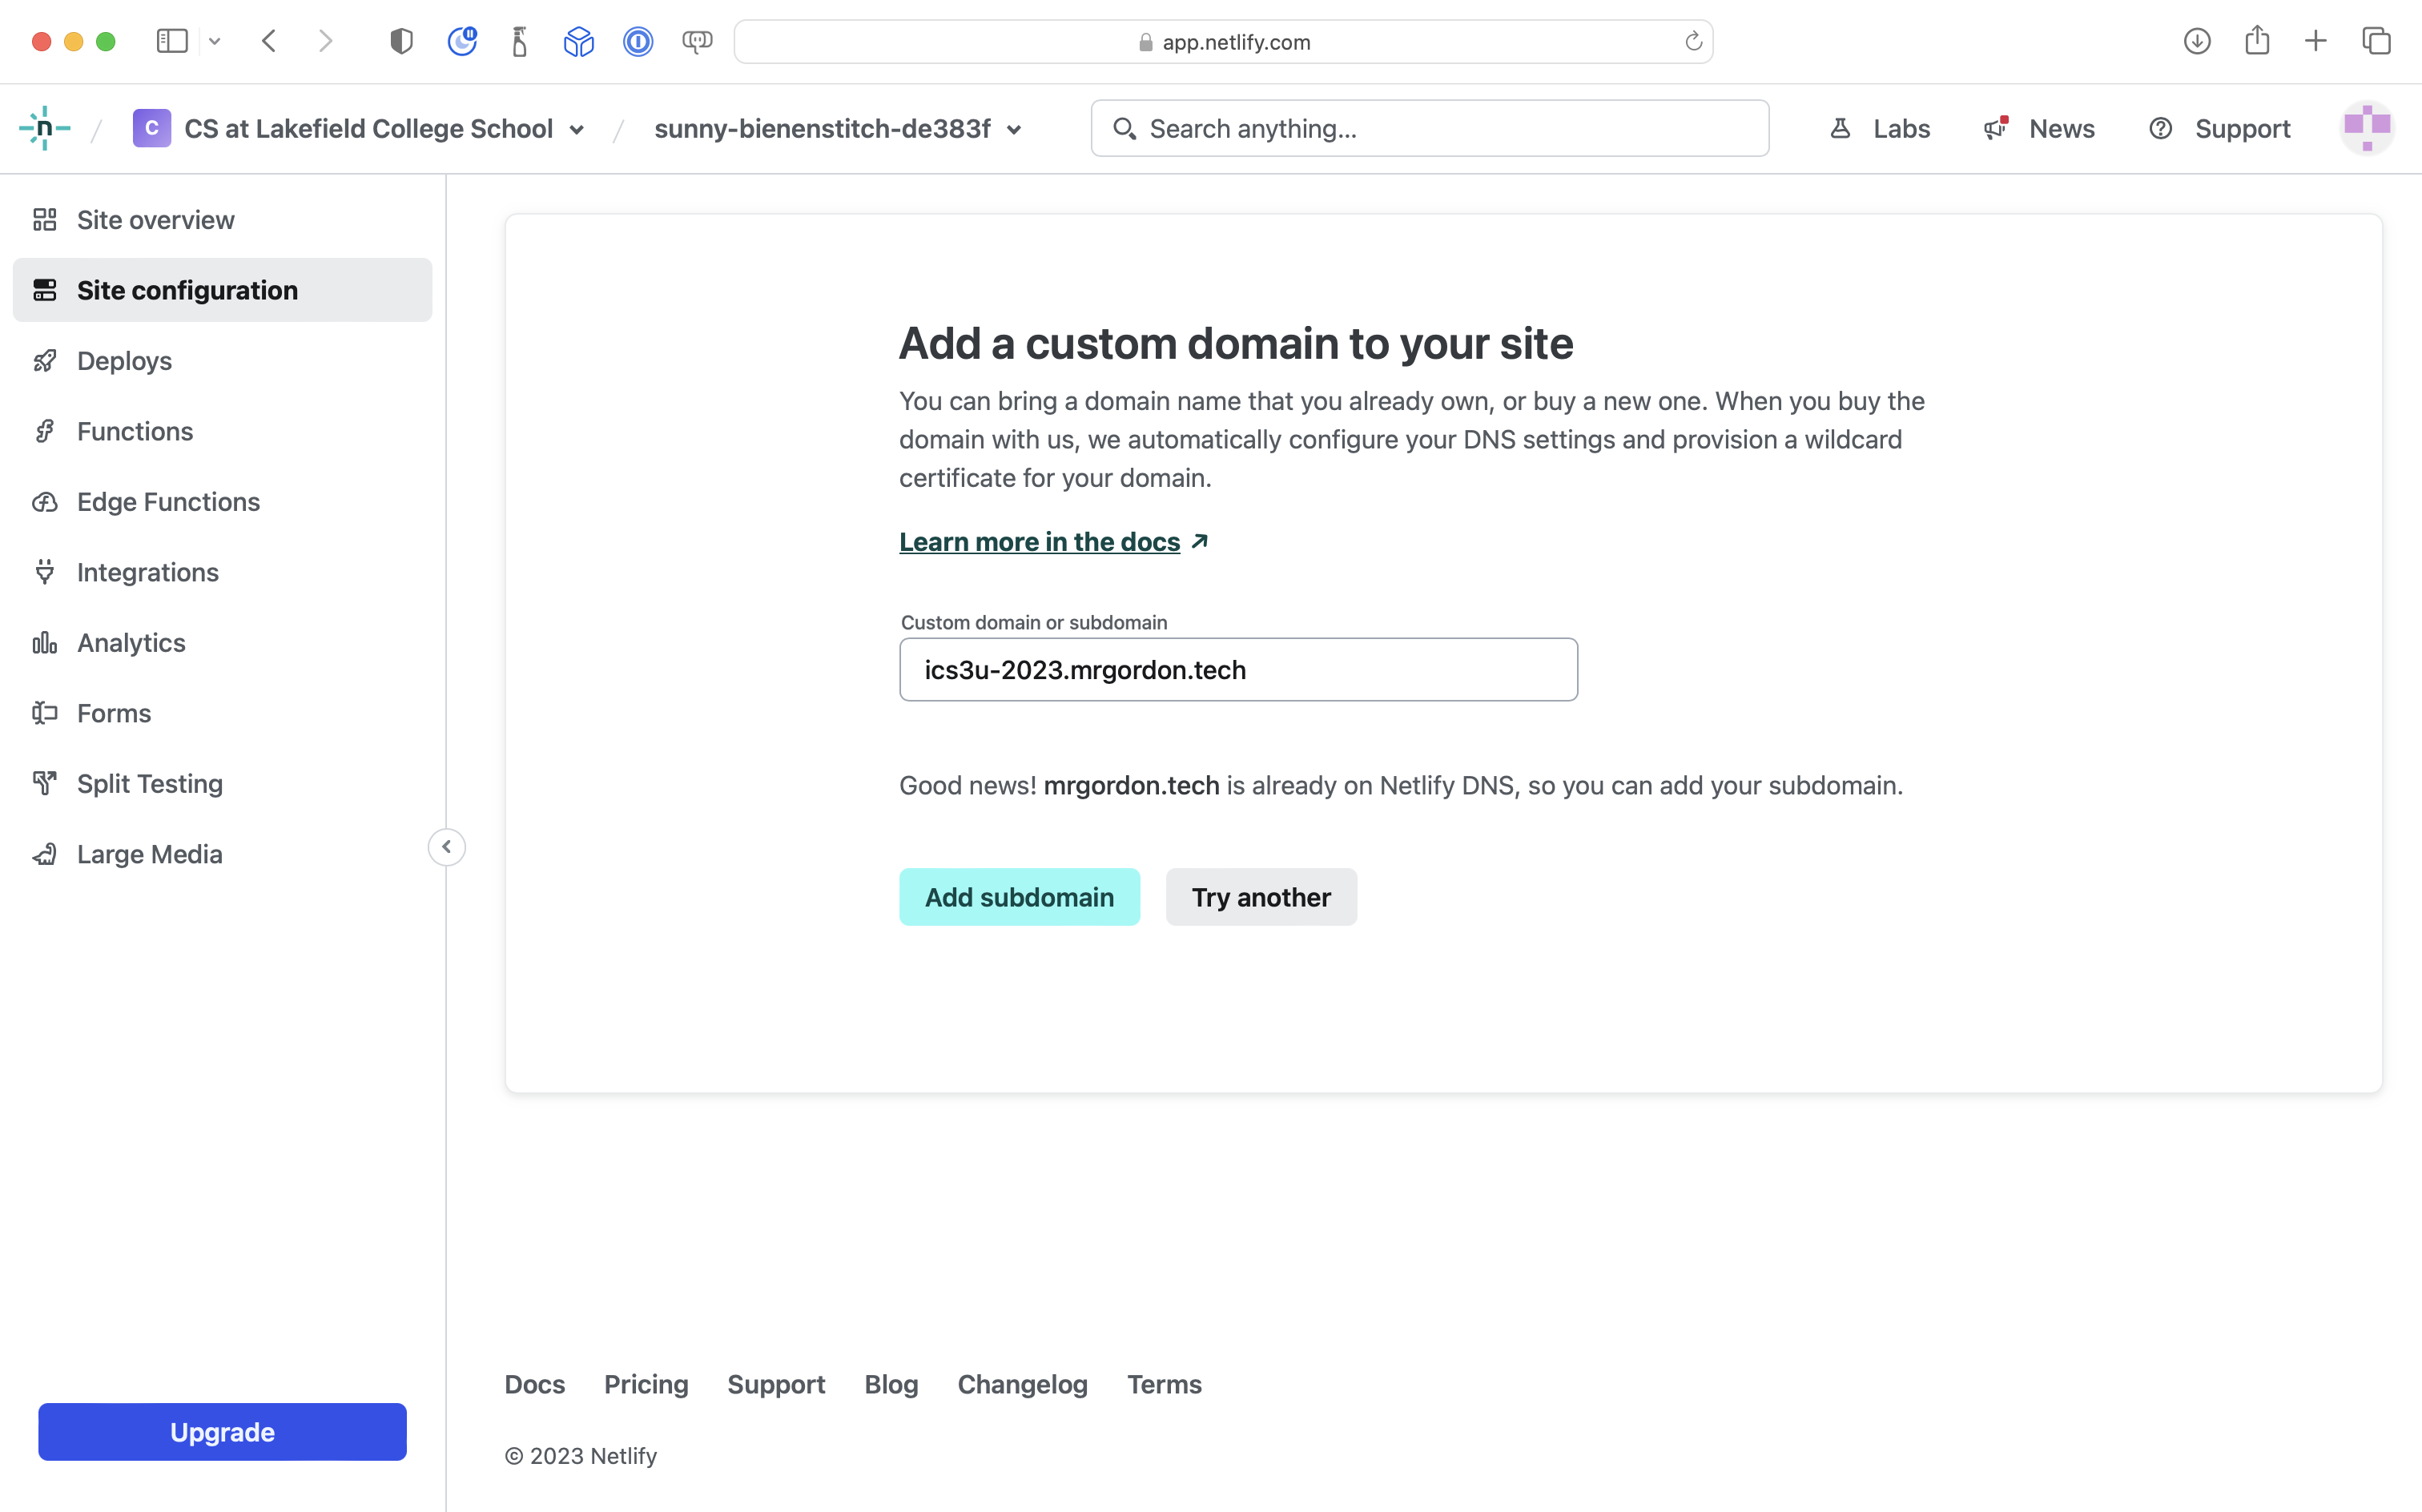
... then to assign a subdomain to a deployment, all you need to do is add a custom domain and provide the subdomain name.
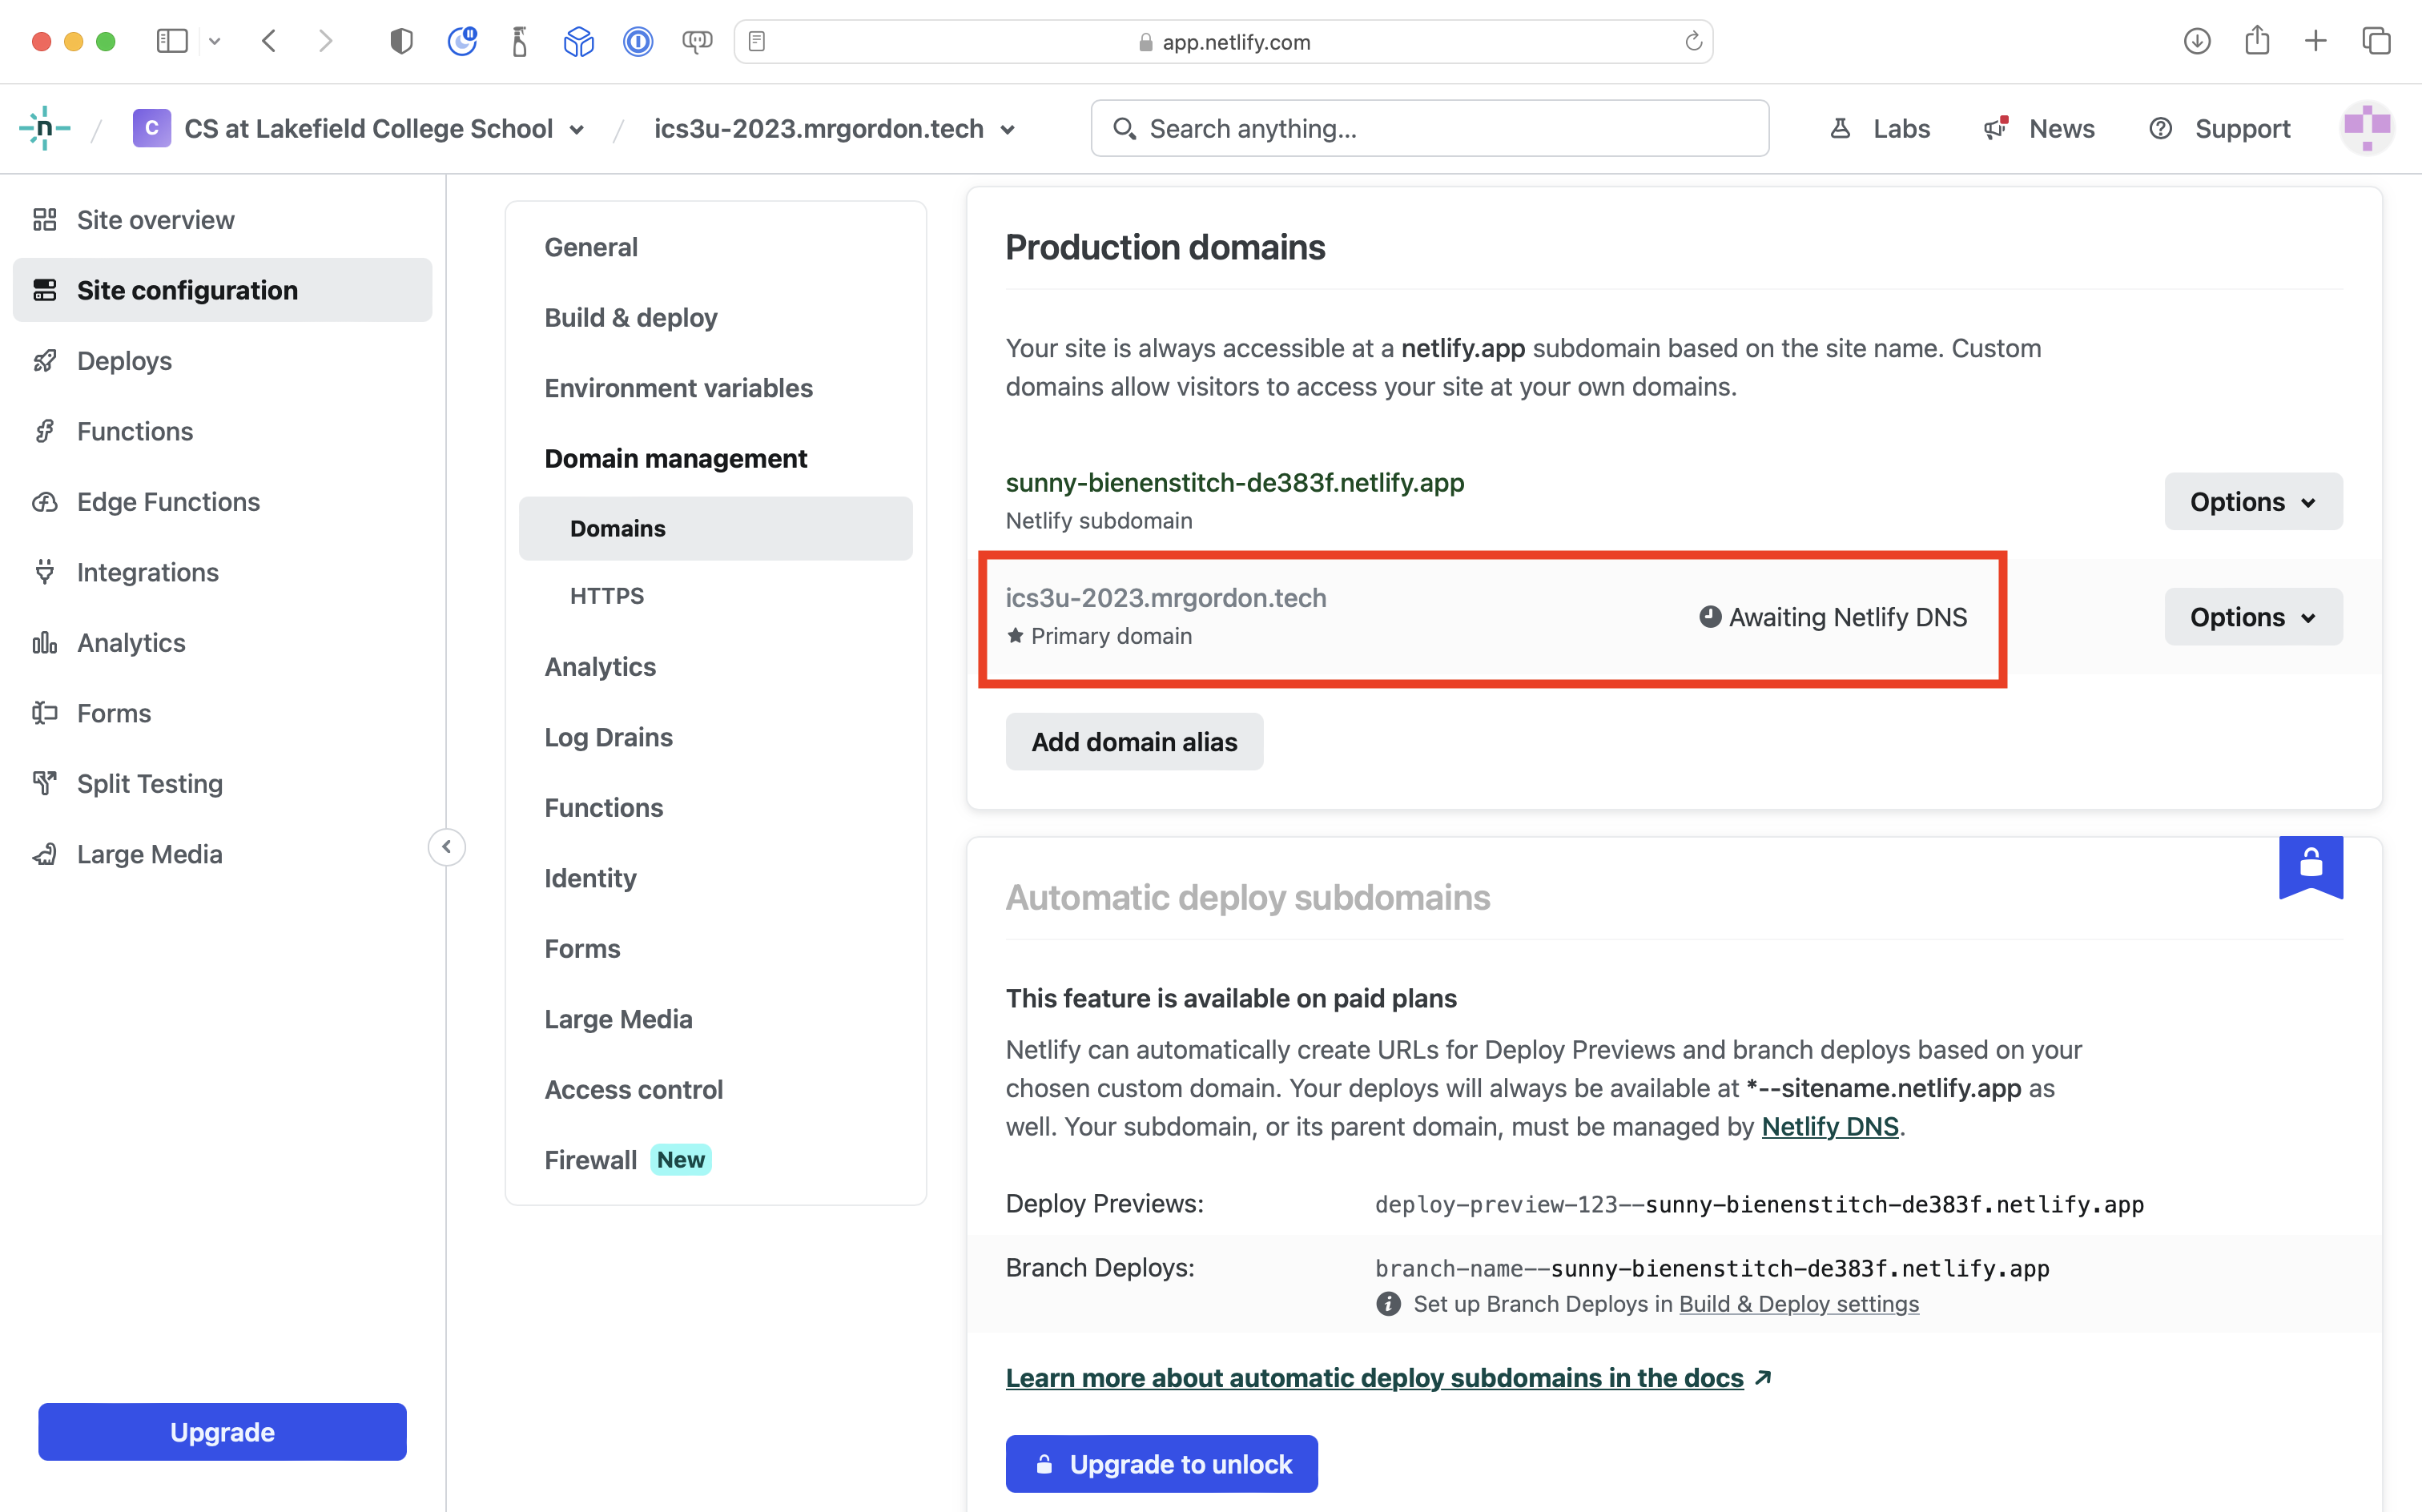
For your deployment on Netlify, visit Site configuration > Domain management > Domains.
Then look for the Options ⏷ dropdown at right, and add the custom subdomain name:
You will see the following status:
Shortly thereafter (about half an hour) you will be able to access the deployment at the subdomain you specified:
Conclusion
This concludes part five of the tutorial. You have learned how to publish your site at a custom domain.