Template
Install the template
One of the more time-consuming aspects of setting up a course website using Obsidian is deciding upon a structure for that site.
Assuming that you have followed the steps to create a website provided in this session, you can follow these steps to install a template that you are welcome to modify.
-
Download this compressed file and de-compress it.
It contains the structure of the example site provided here, with all attachments (images and animations) removed – these add up to more than 800 MB of data that you will not need.
Navigate to the vault folder for a course website that you have set up and move or copy the de-compressed files into the vault folder – you can optionally choose whether to over-write the existing Attachments folder:

-
After placing the new files into your vault folder, they will immediately appear in Obsidian.
You can explore the structure provided and modify as needed.
This template assumes you are running multiple sections of the same course:
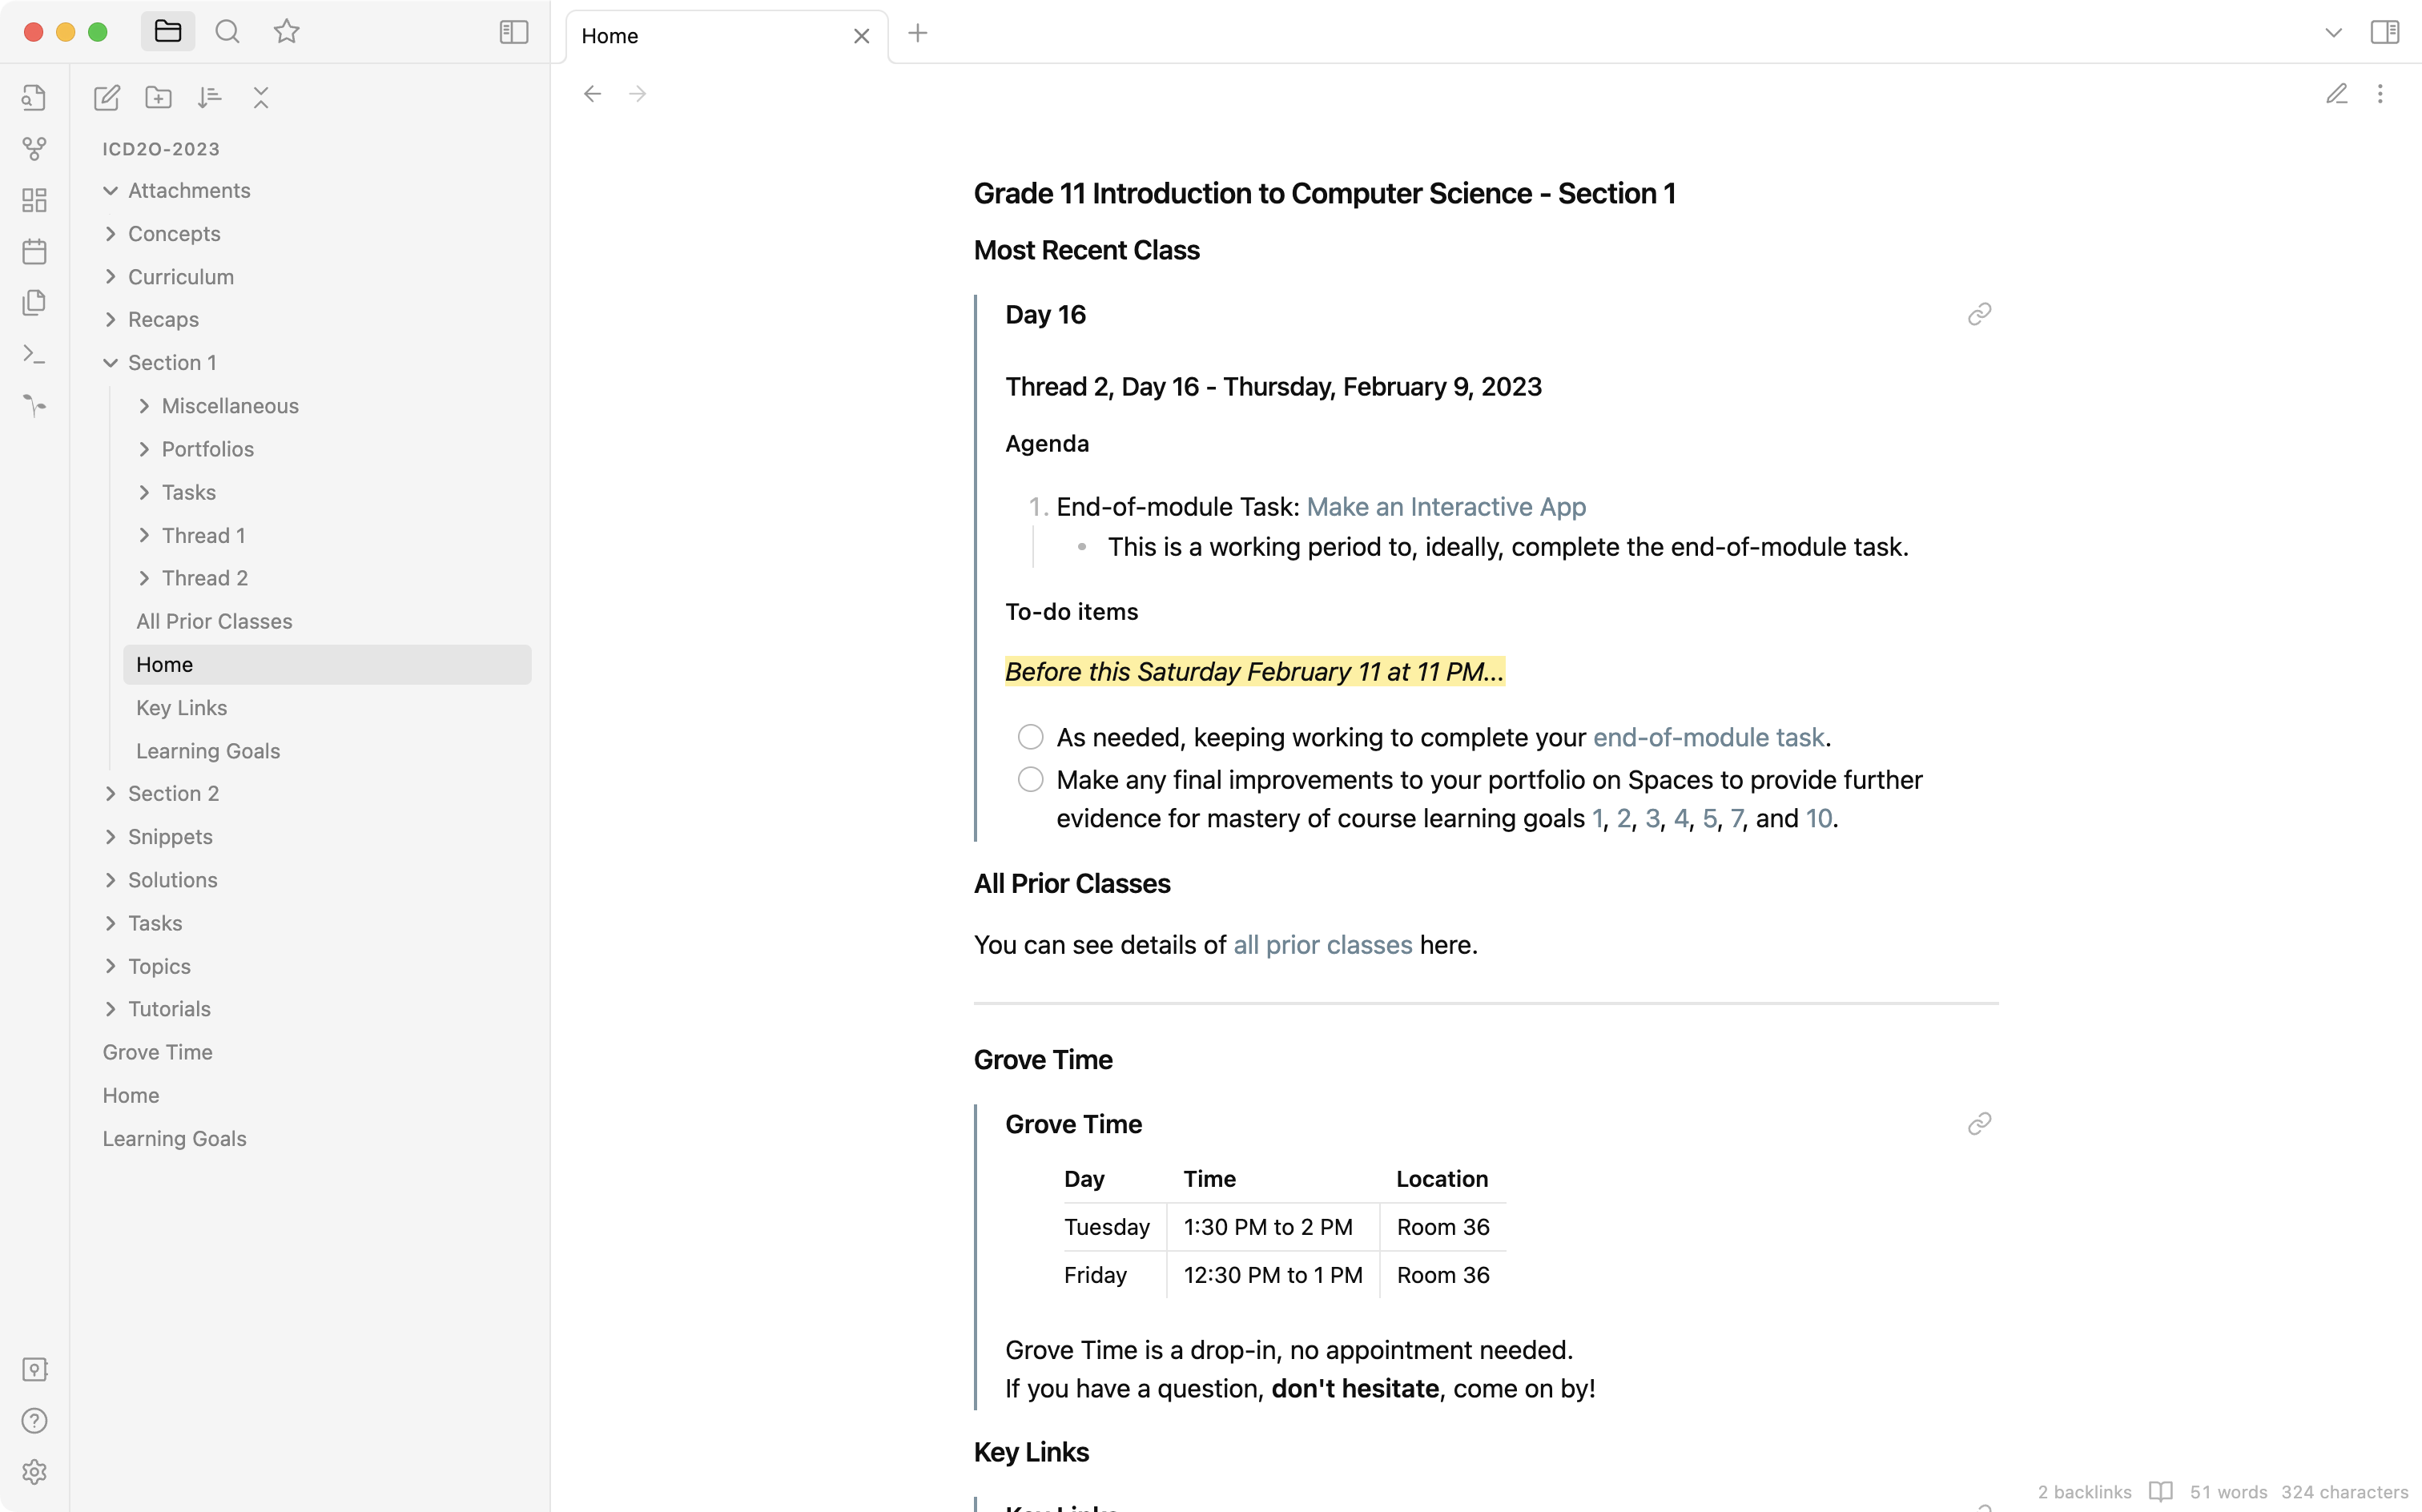
You would provide the URL of the Home note to students in a given section of a course:
Enable search and other note settings
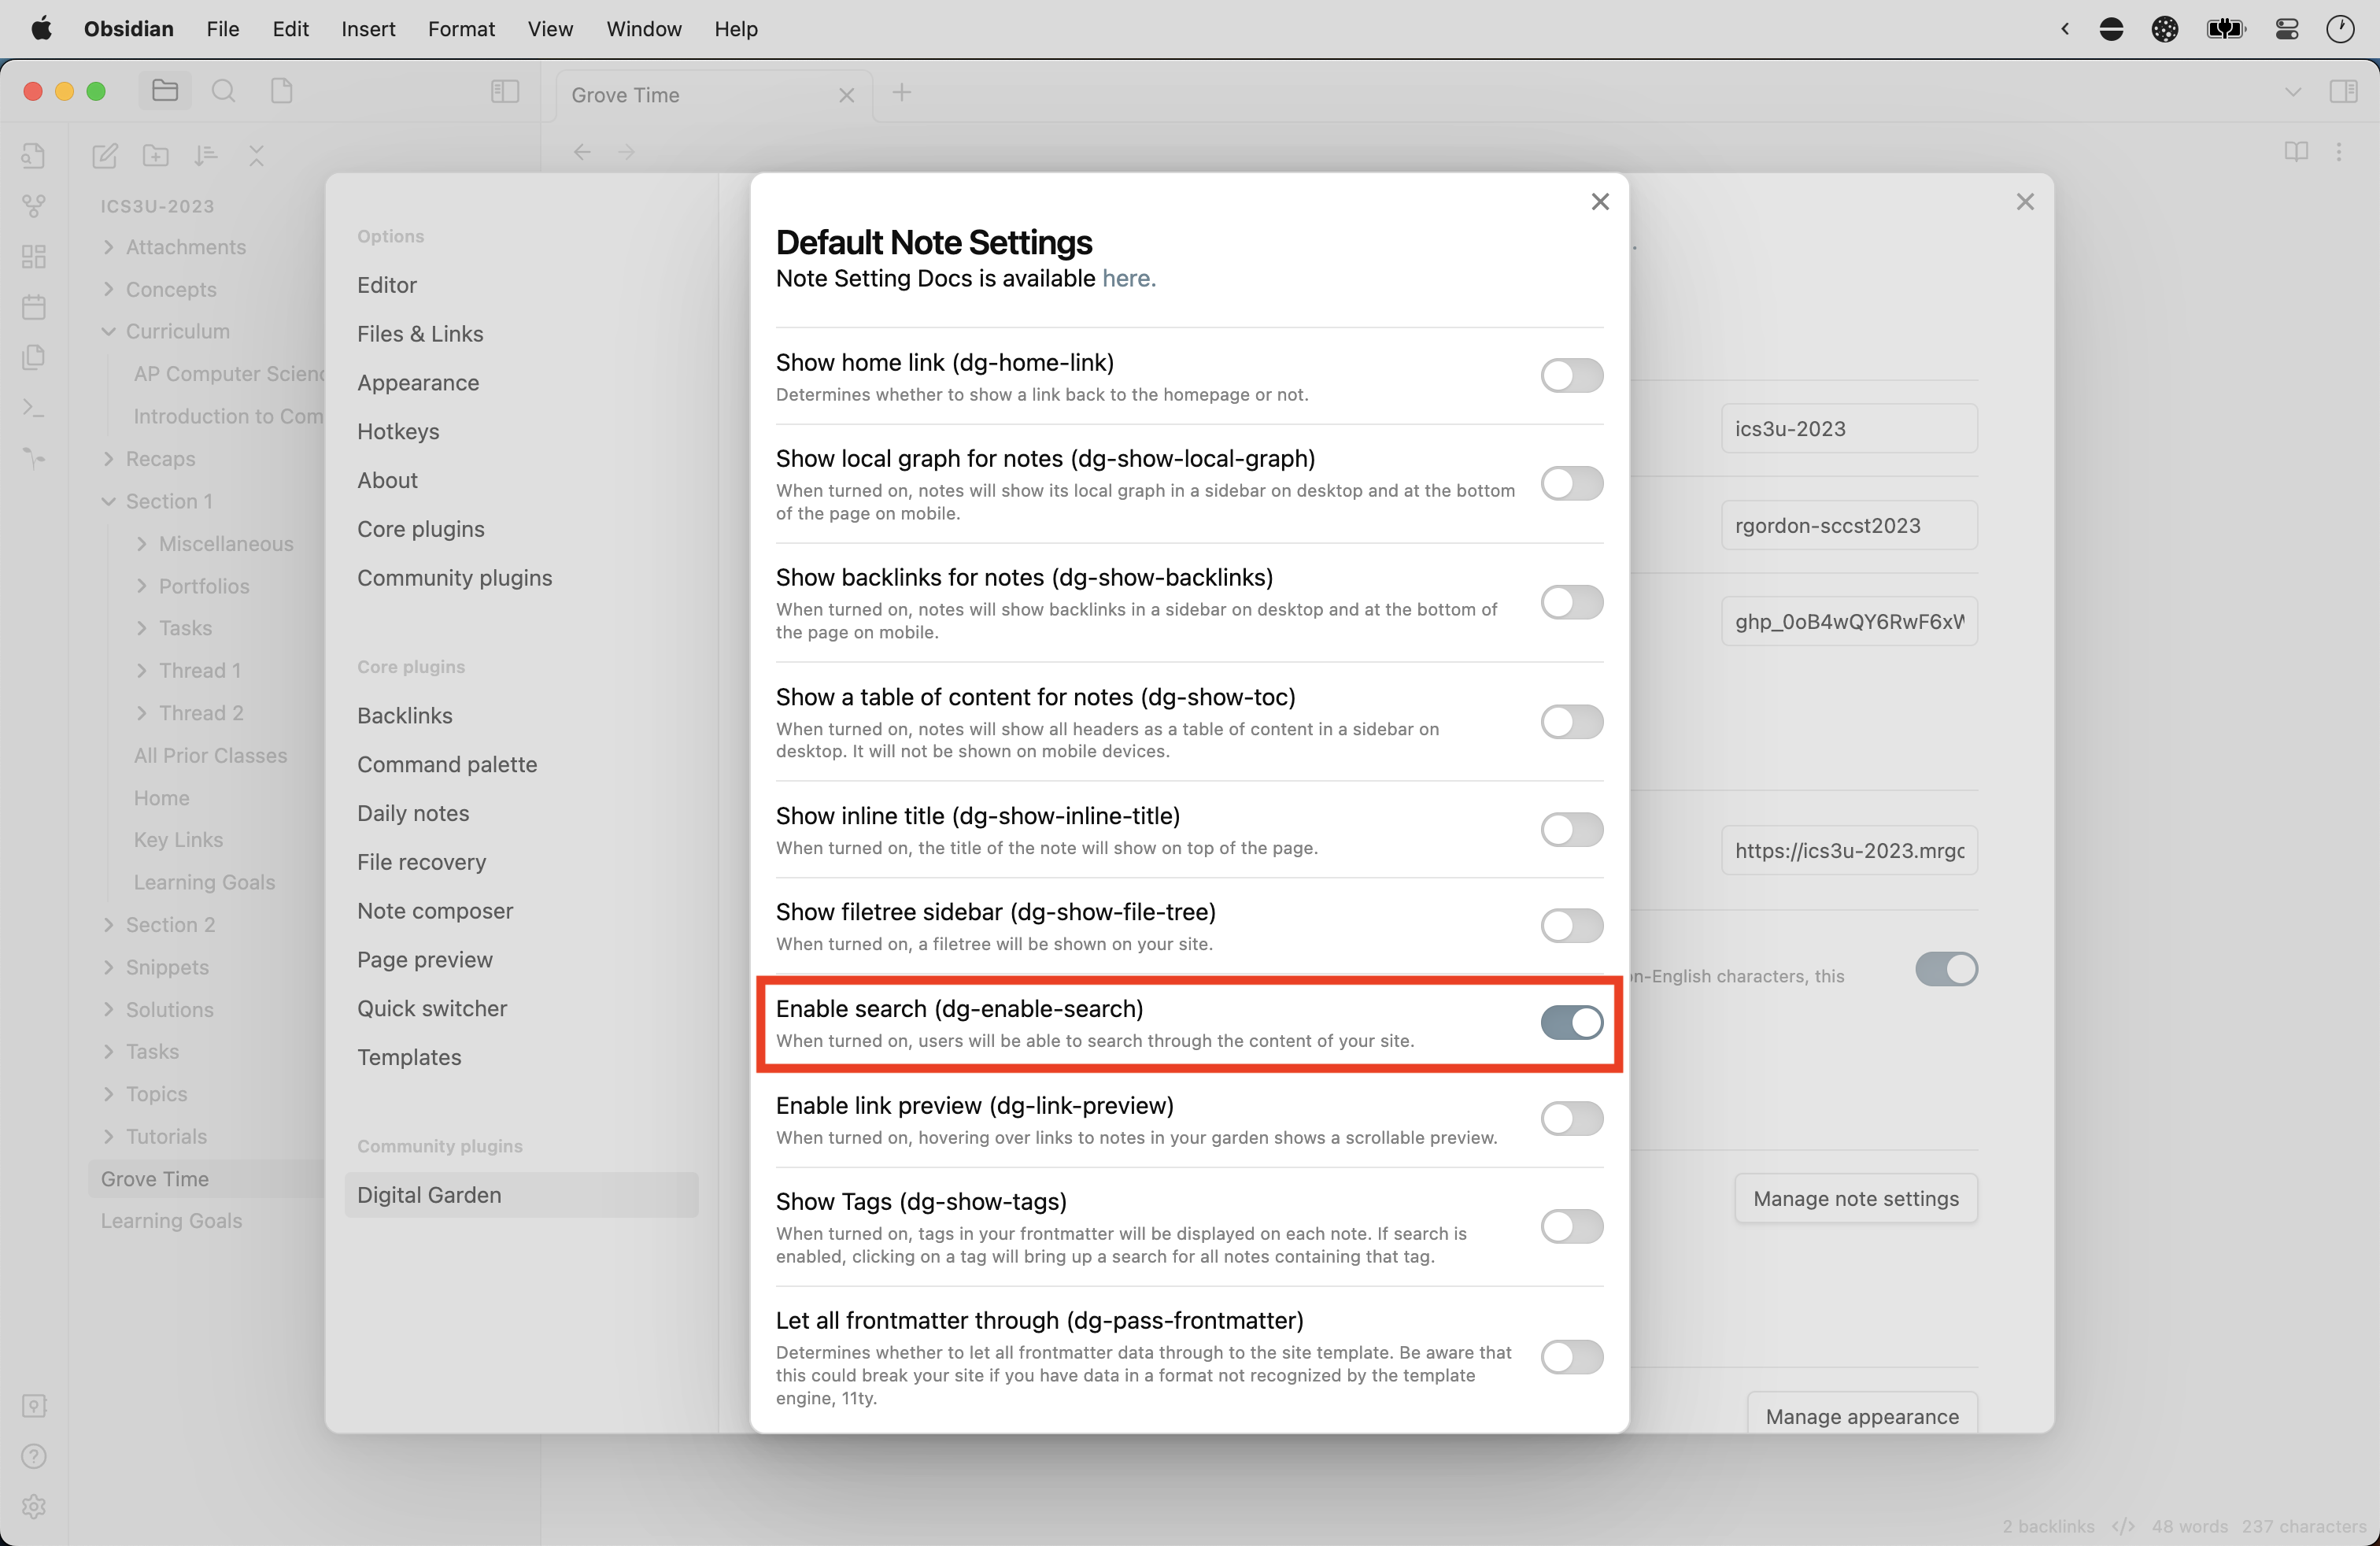
To enable site-wide search, open Obsidian > Settings... and select the Digital Garden option at left. Then press the Manage note settings button:

Then enable site-wide search:
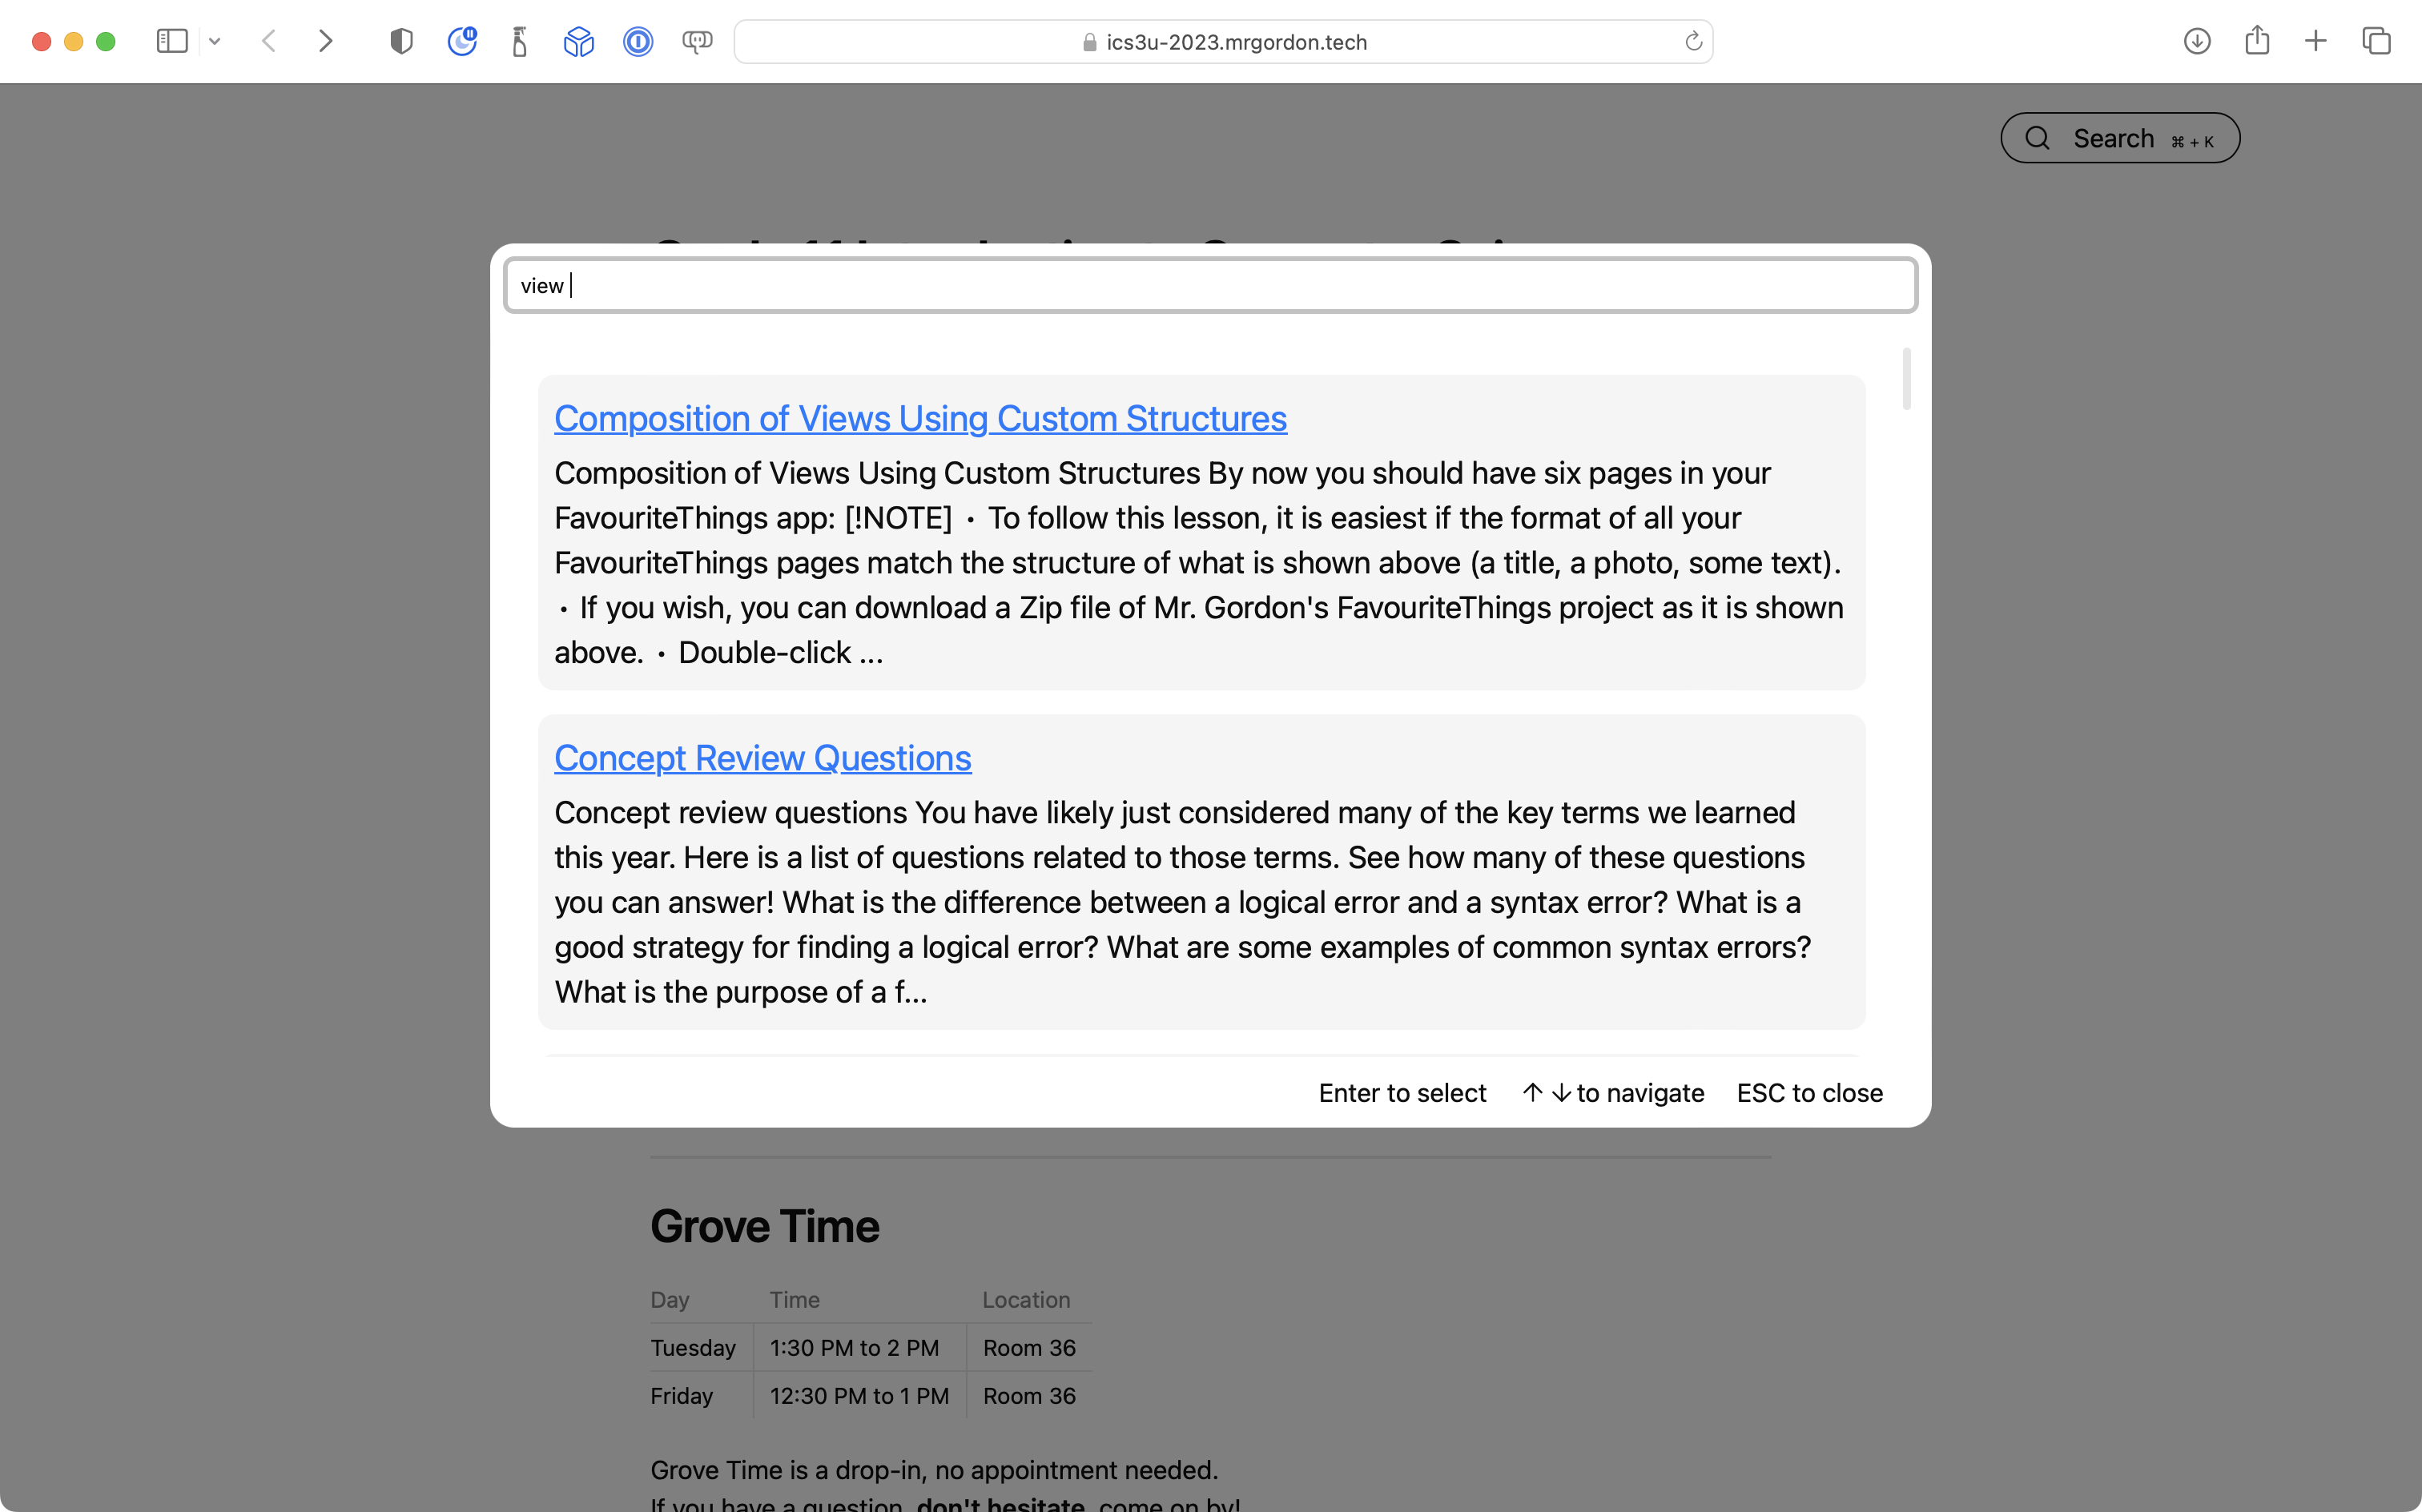
A deployment should automatically be triggered on Netlify, after which on the live site you should be able to search across the site content using the field provided or the Command-K or Control-K keyboard shortcuts:
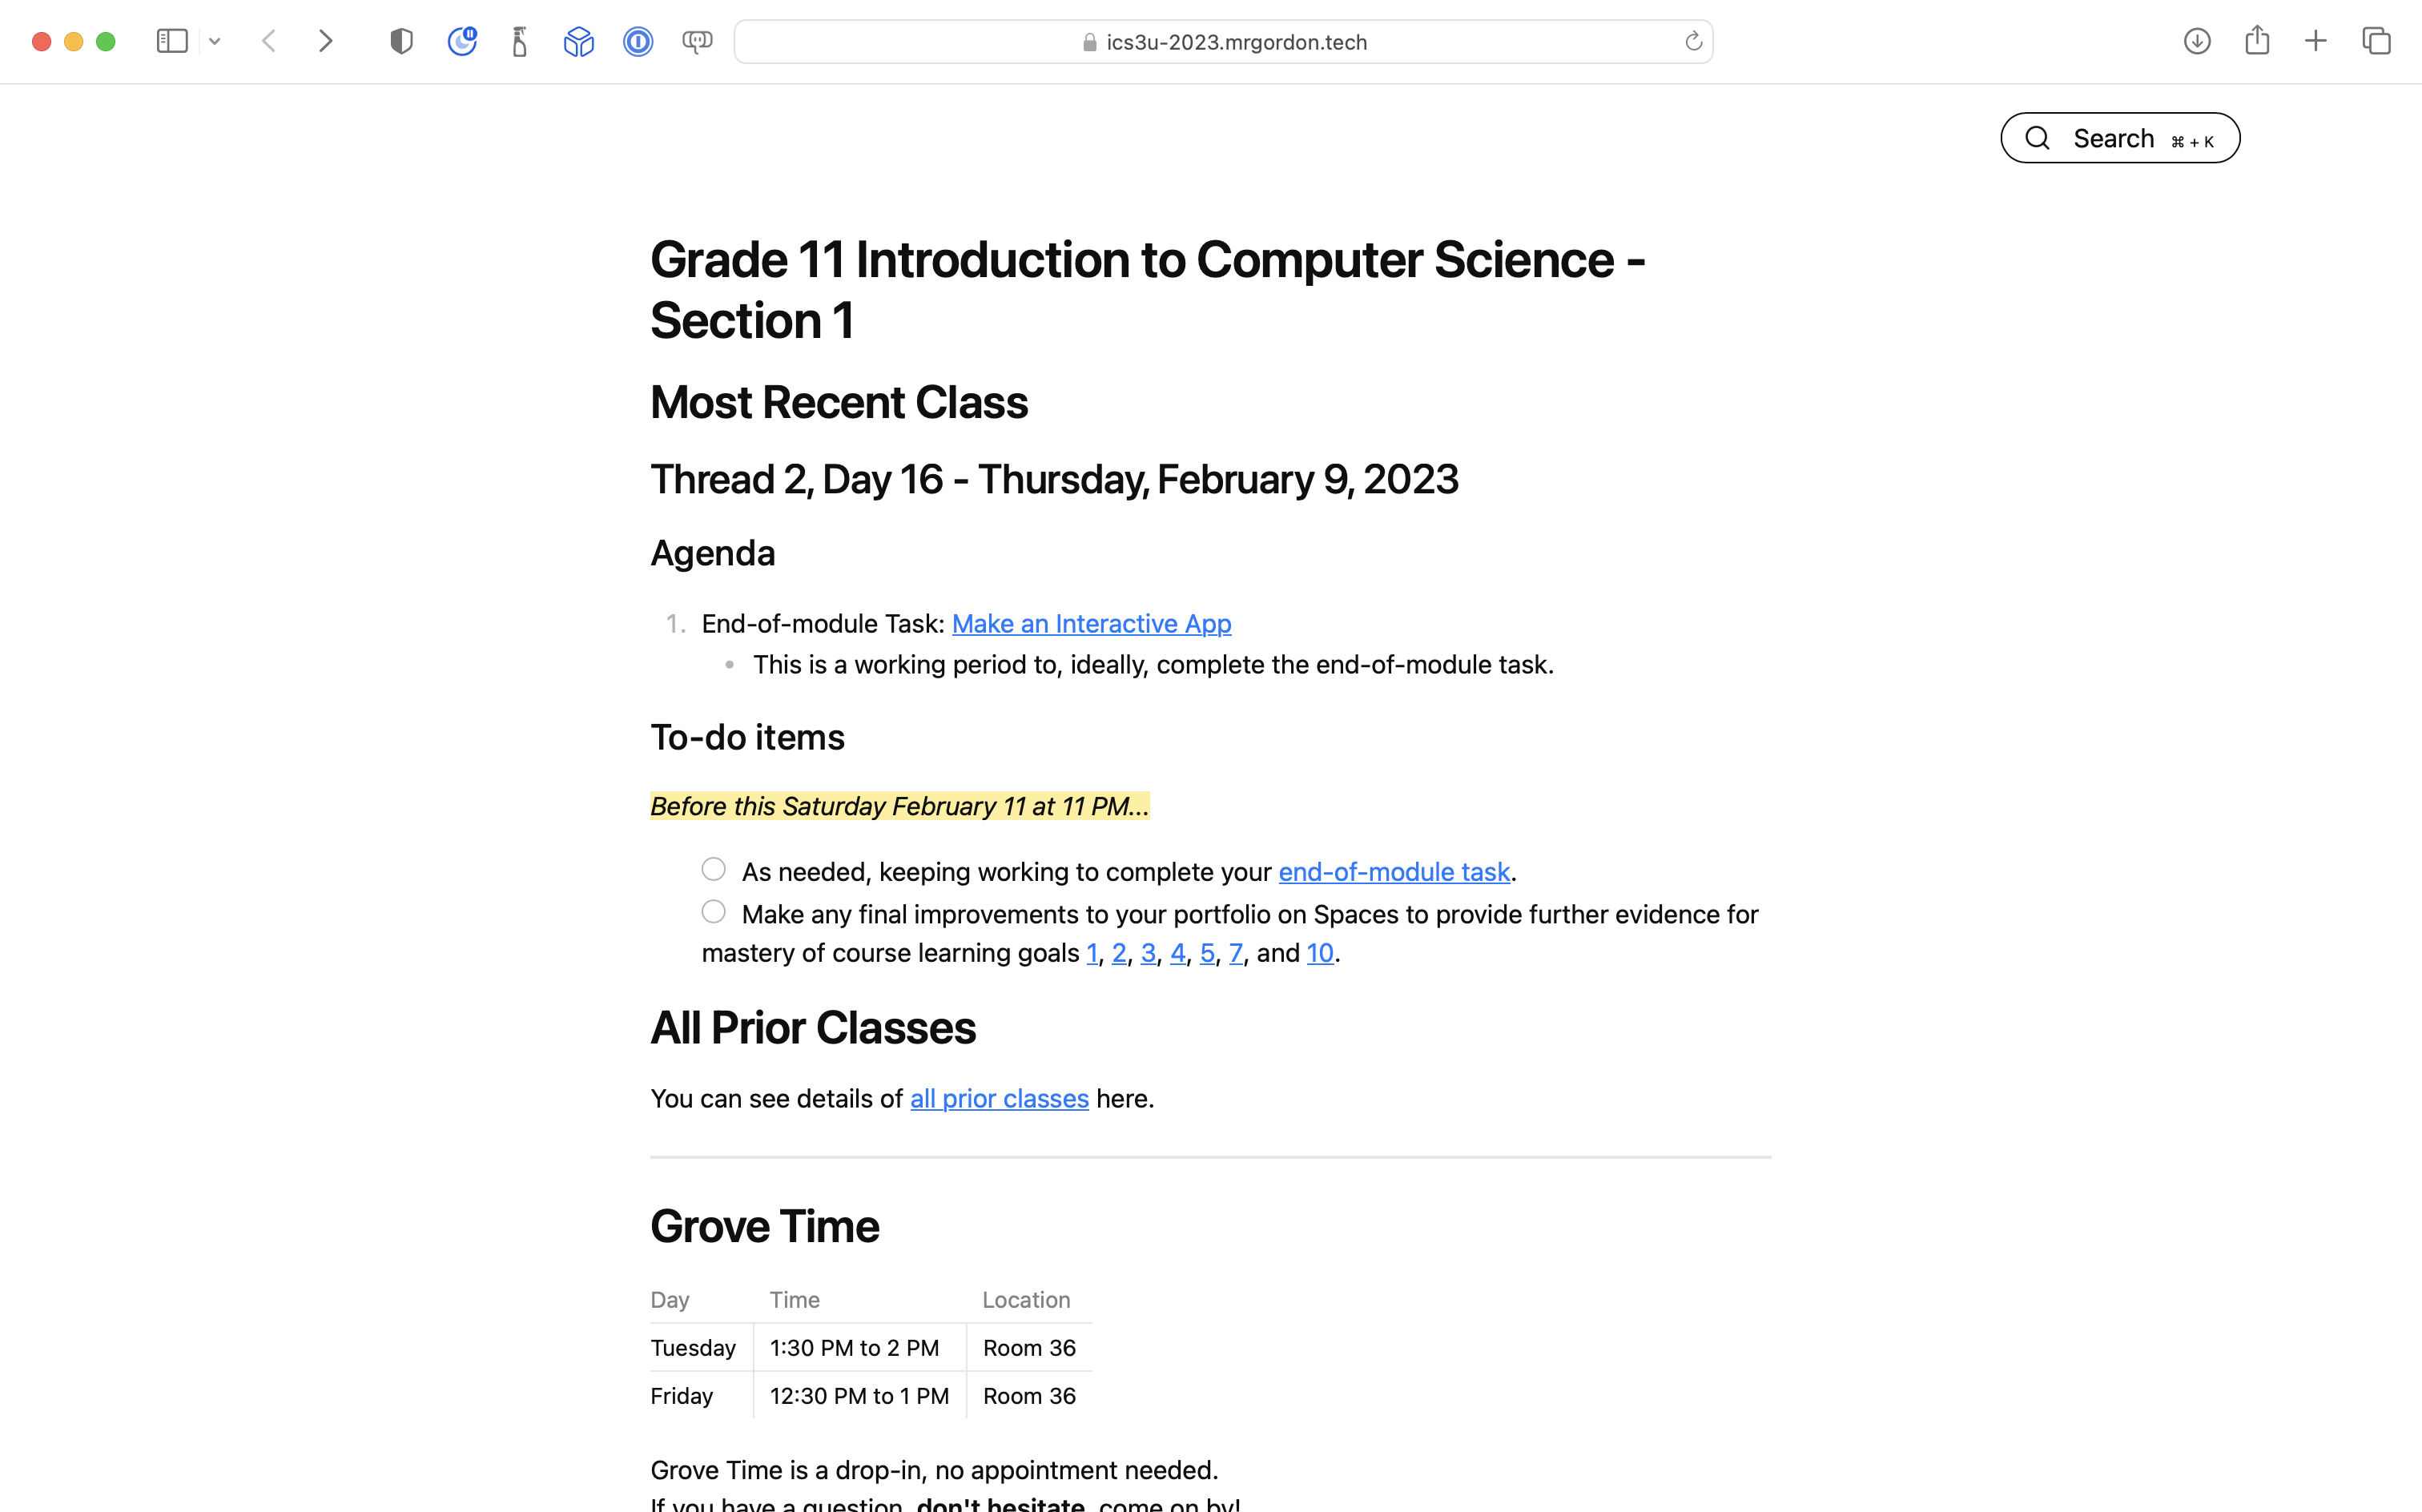
And navigate search results, using the keyboard:
You can review and try out other note settings described here.