Part 3: Screenshots
Goals
Learn how to manage screenshots and attachments in Obsidian, and control the publishing pipeline so that high-quality images are not automatically downsampled.
Steps to Complete
-
Adding screenshots to a note is as simple as copy and pasting or dragging and dropping.
Try this now:

Note that by default, images are added to the same folder as the note they are added to.
The author finds that with this default setting, as a vault grows, navigating among files using the Obsidian file tree (at left) becomes quite cluttered.
The author recommends configuring Obsidian to place all attachments in a separate folder.
First, create a folder named Attachments as a sub-folder of the folder that contains your vault:

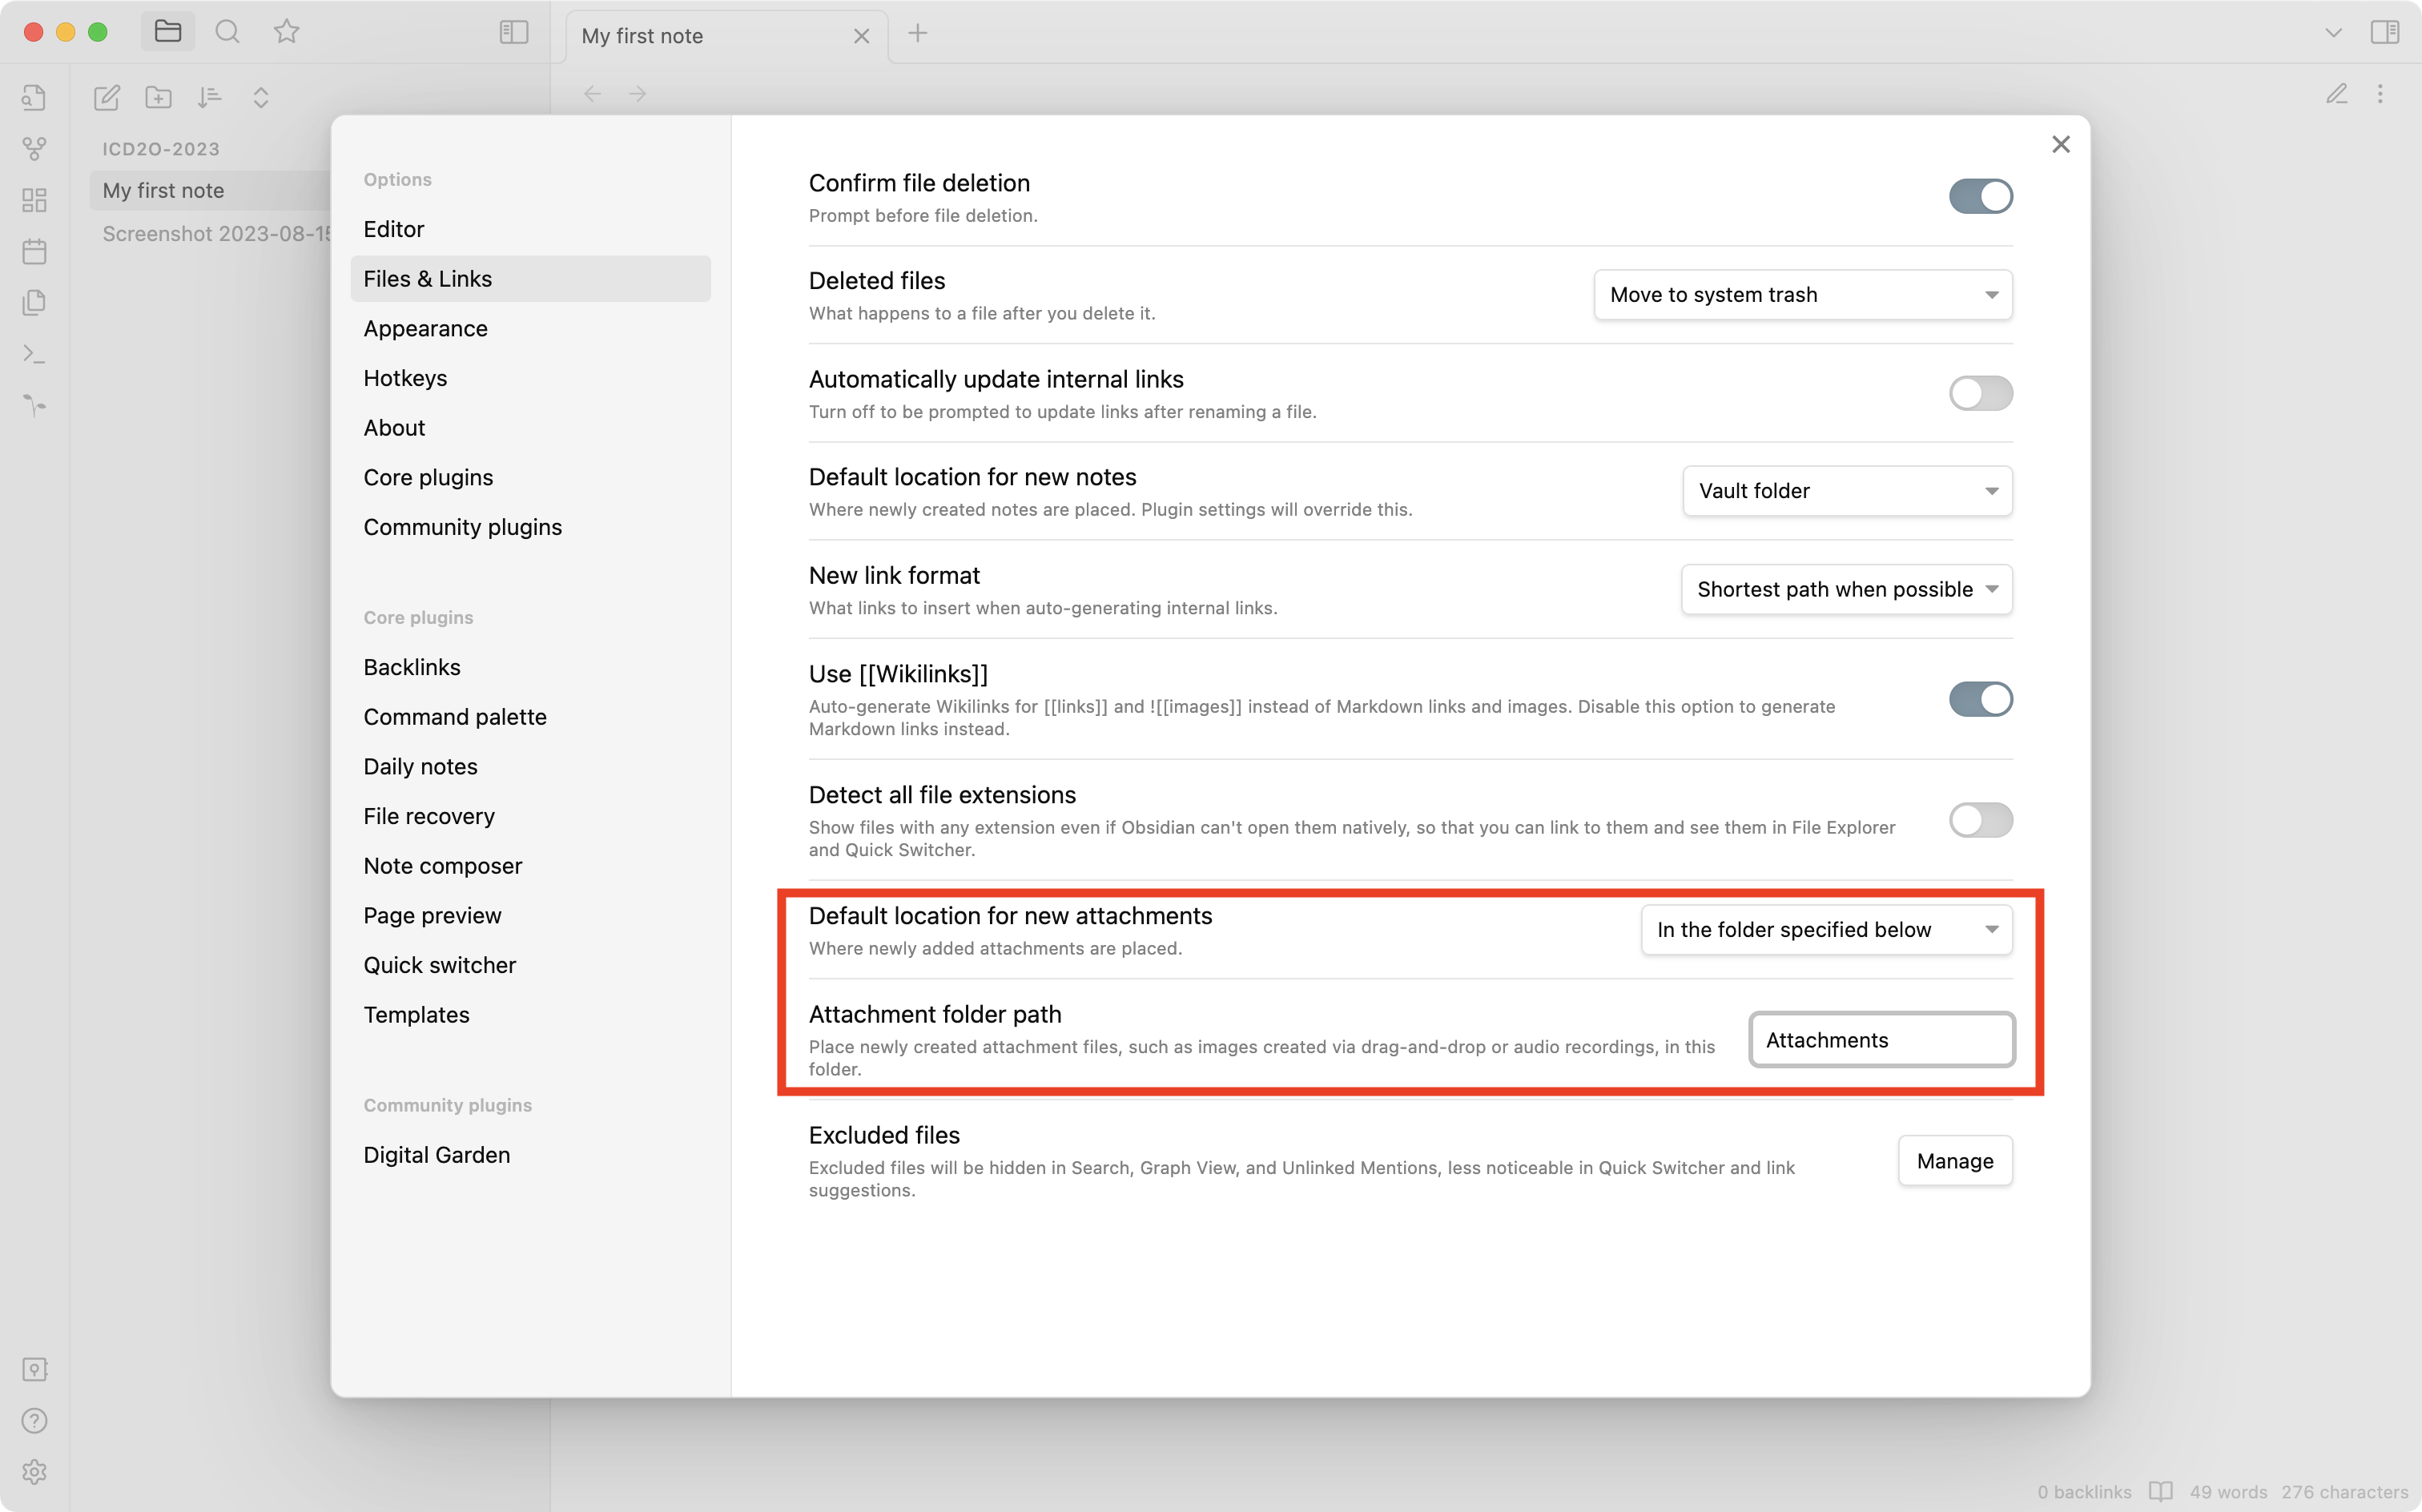
Now choose Obsidian > Settings... from the menu, then select Files & Links.
Change the settings as shown below:
Now try adding another screenshot:

Note how the screenshot is added to the subfolder instead.
-
Try publishing your page using the command palette.
Press
Command-PorControl-P, search for Publish Multiple Notes, then press Enter or Return.Then use the command palette again to run the Copy Garden URL command, and open this page in your web browser (it may take a moment for Netlify to publish your changes).
If you look carefully at the screenshots, you will note that they are very low quality. By default, the Digital Garden plugin applies aggressive image optimization to ensure that published web pages do not consume excessive bandwidth.
Practically speaking, your course website will only be seen by a small number of people. As such, bandwidth consumption is not a significant concern.
Given that his tutorials often involve detailed steps, sometimes in software with busy user interfaces, the author prefers to control how images are optimized himself.
Fortunately, we can disable the image optimization performed by the Digital Garden plugin. Unfortunately, there is not yet a setting within Obsidian to control this. As a result, we must make a one-line edit to a configuration file in our GitHub repository.
Navigate to GitHub, and into the repository holding your course website:
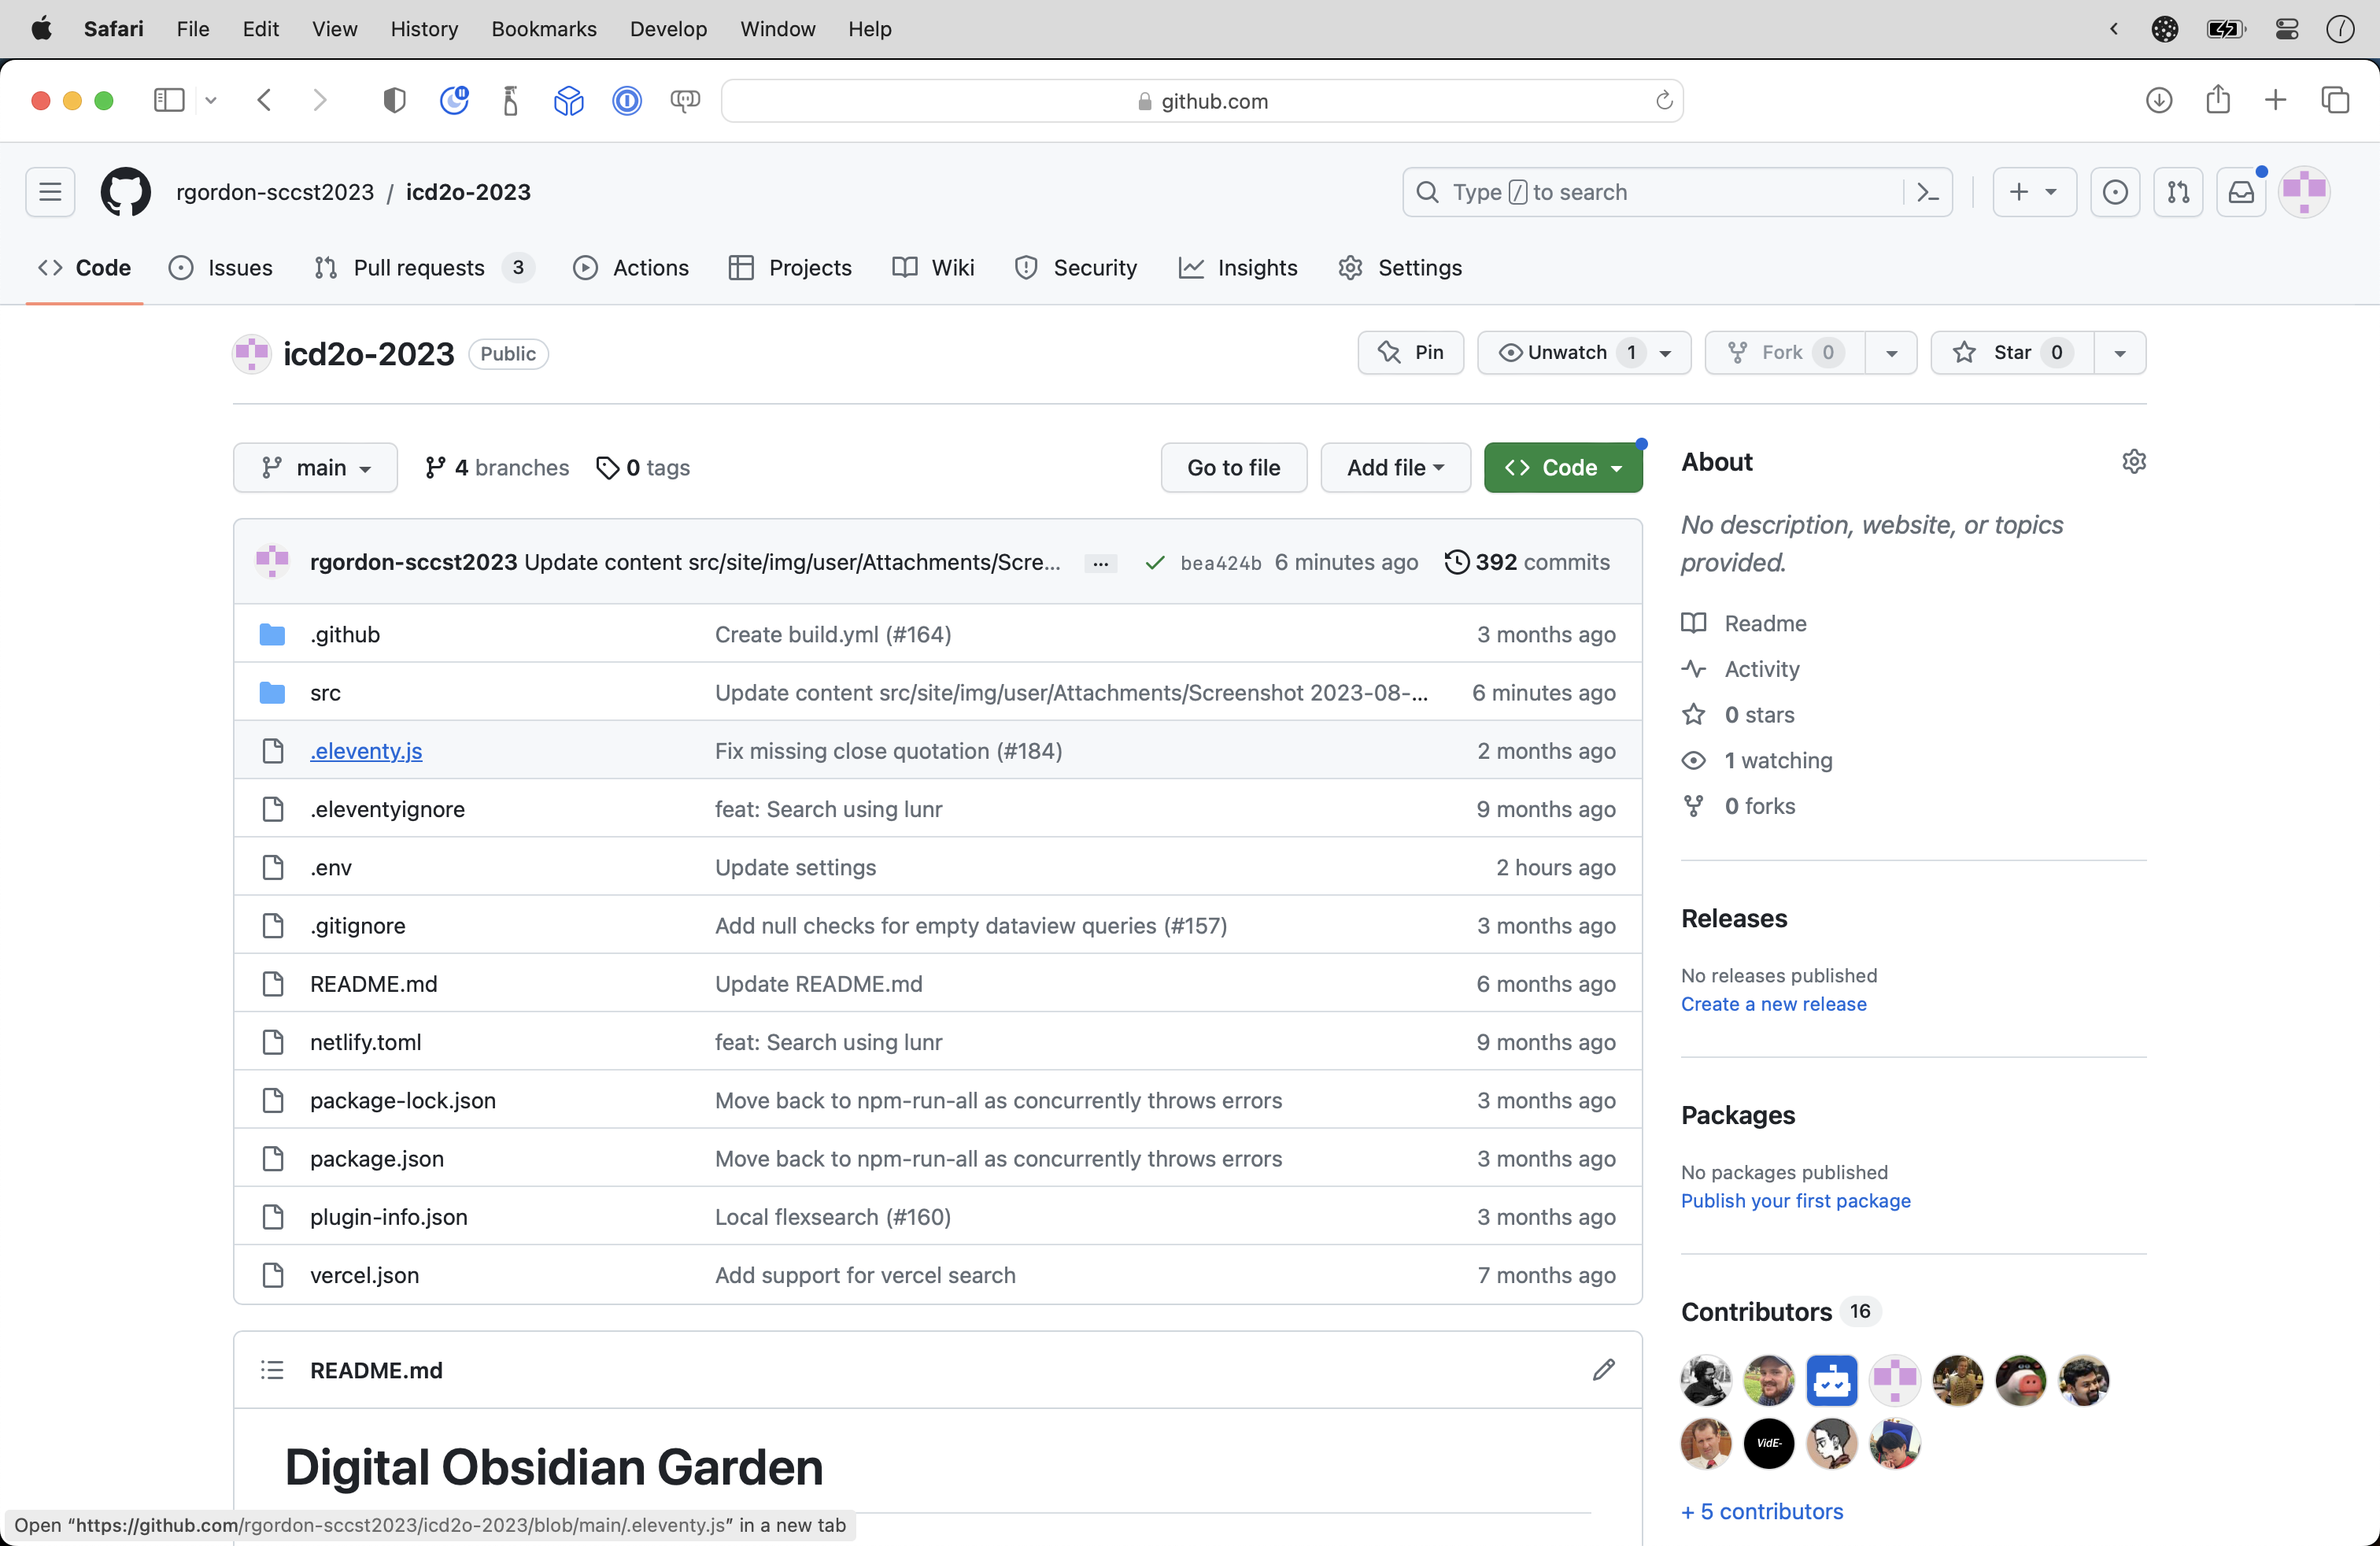
Click to open the
.eleventy.jsfile, tap the pencil icon to edit the file, and then scroll to line 385.Replace the code:
if (src && src.startsWith("/") && !src.endsWith(".svg")) {... with this code instead:
if (src && src.startsWith("/") && !src.endsWith(".svg") && !src.endsWith(".png") && !src.endsWith(".gif")) {Then press the green Commit changes... button.
Add this commit message:
Ensure that PNG and GIF files are not optimized when published.Then press the green Commit changes button.
Now add another screenshot to your note, publish the note, and then check that the page was published and that images are no longer heavily optimized:

Conclusion
This concludes part three of the tutorial. Screenshots are kept in a predictable location in Obsidian and images are not downsampled when published to your website.
Next, see how Mermaid can be used within Obsidian to easily create flowcharts and other diagrams.